

☕️ TL;DR – Motion KeyFraming allows you to set the position and size of the Crop Box at specific points in your video, giving you full creative control. This enables you to create panning and/or zooming effects with precision and accuracy.

☕️ TL;DR – Motion KeyFraming allows you to set the position and size of the Crop Box at specific points in your video, giving you full creative control. This enables you to create panning and/or zooming effects with precision and accuracy.

☕️ TL;DR – Crop Settings and Project Settings allow you to set visual and audio parameters that will affect all the clips on your timeline.

☕️ TL;DR – If your video contains people speaking, you can display the dialogue on the screen by activating Kamua’s Automatic Captions feature and you can manually edit or create a Transcript.

☕️ TL;DR – If your video contains action sequences, people or objects that are not in the center of the video and you need to crop the video for a mobile format, you can use AutoCrop to crop the entire video or just the Clips that have movement.

☕️ TL;DR – You Library contains all the Media you have uploaded to Kamua. You can view, create Projects & arrange your Media in folders.
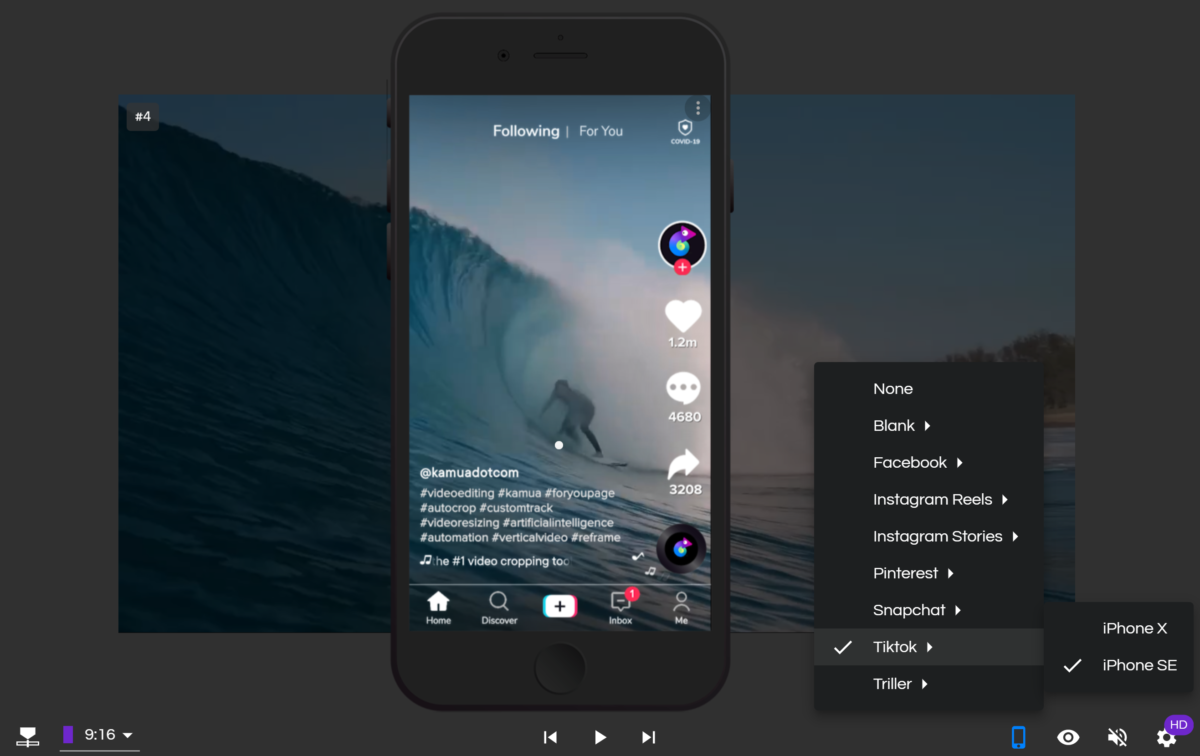
☕️ TL;DR – A Social Media Skin is a way to pre-visualise what your videos will look like on mobile social platforms, such as TikTok, Instagram Reels, Facebook Stories, Triller, Snapchat and Pinterest.
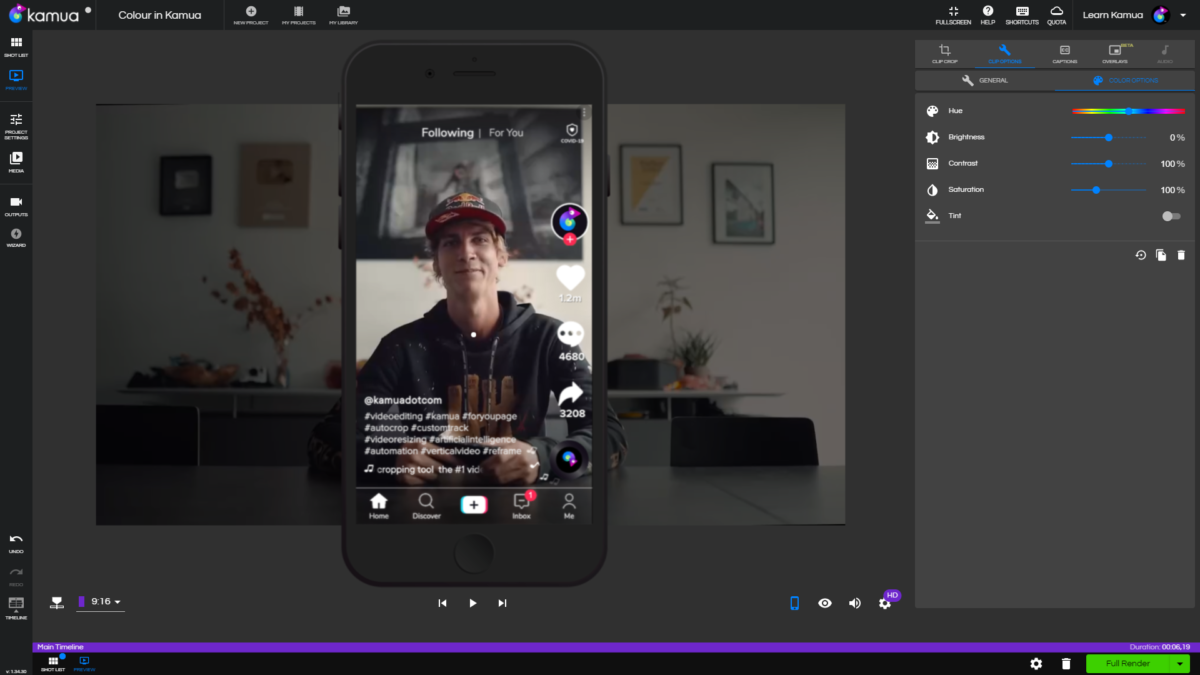
☕️ TL;DR – Kamua has powerful color and lighting adjustment tools directly in your web browser. You can change hue, brightness, contrast and saturation with a few clicks.
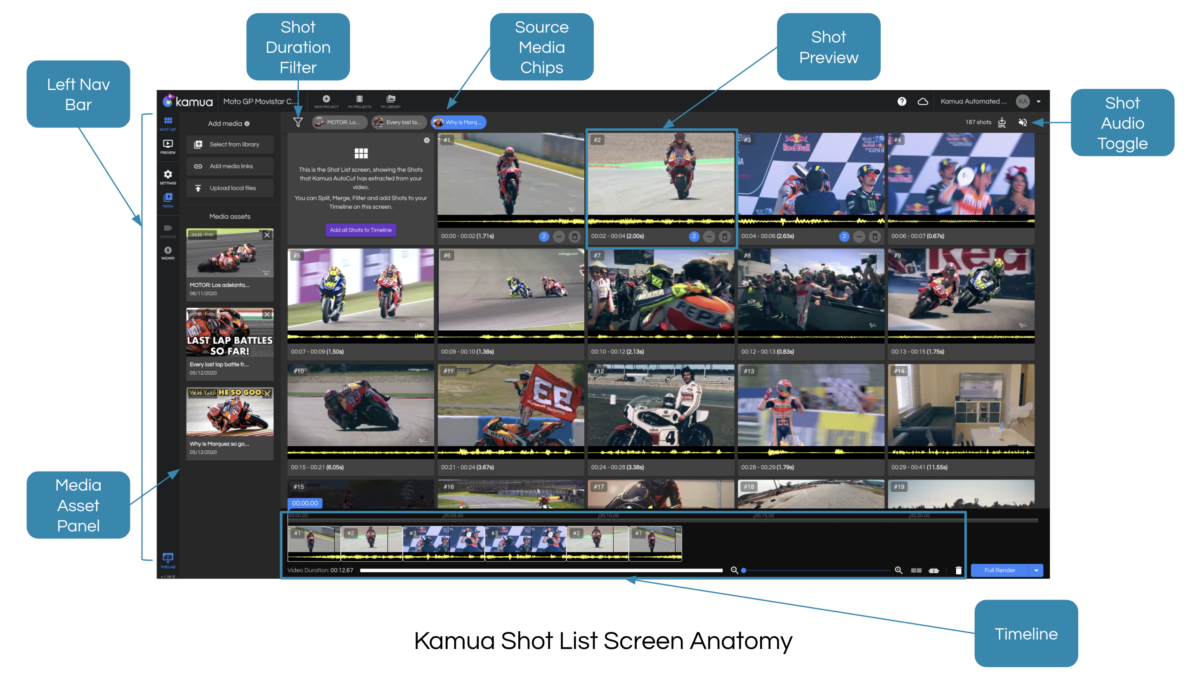
☕️ TL;DR – The Shot List shows you the Shots that Kamua AutoCut has made from your video, so you don’t have to find cut points manually. Each Media Asset (source) has its own Shot List. You add Shots to your Timeline to get started with your edit.

☕️ TL;DR – You can retrace your steps in Kamua using the Undo and Redo buttons in your left navigation panel.
☕️ TL;DR – You can Split Clips from the Timeline using the scissor button on the Playhead or pressing “C” on your keyboard.


