
Kamua has been acquired and is now part of Jellysmack. Our tools and services are being incorporated into Jellysmack’s creator tools. For more information, please read below.
Category: Help

☕️ TL;DR- The Timeline is an interface where you lay Clips, one after the other (in a linear fashion) to create a video. It’s at the bottom of the Kamua Studio screen and can be turned on/off by using the button on the bottom of the left navbar.


☕️ TL;DR – Your Outputs are the rendered versions of your videos which appear after you hit the “Render” button.
Categories
Kamua FAQ
Take a look at our Frequently Asked Questions below

☕️ TL;DR – Kamua supports all standard, non-raw, video file formats for importing media. All videos are rendered in Kamua, using the h.264 codec in a .mp4 container.
☕️ TL;DR – If you like keyboard shortcuts, this list will come in handy. If you aren’t used to using keyboard shortcuts, give ’em a a try!

☕️ TL;DR – To cancel your Kamua account, go to;
Profile > Billing and Subscription > Manage Plan > Account > Cancel Subscription > Confirm Subscription.
See the below steps for more detail.

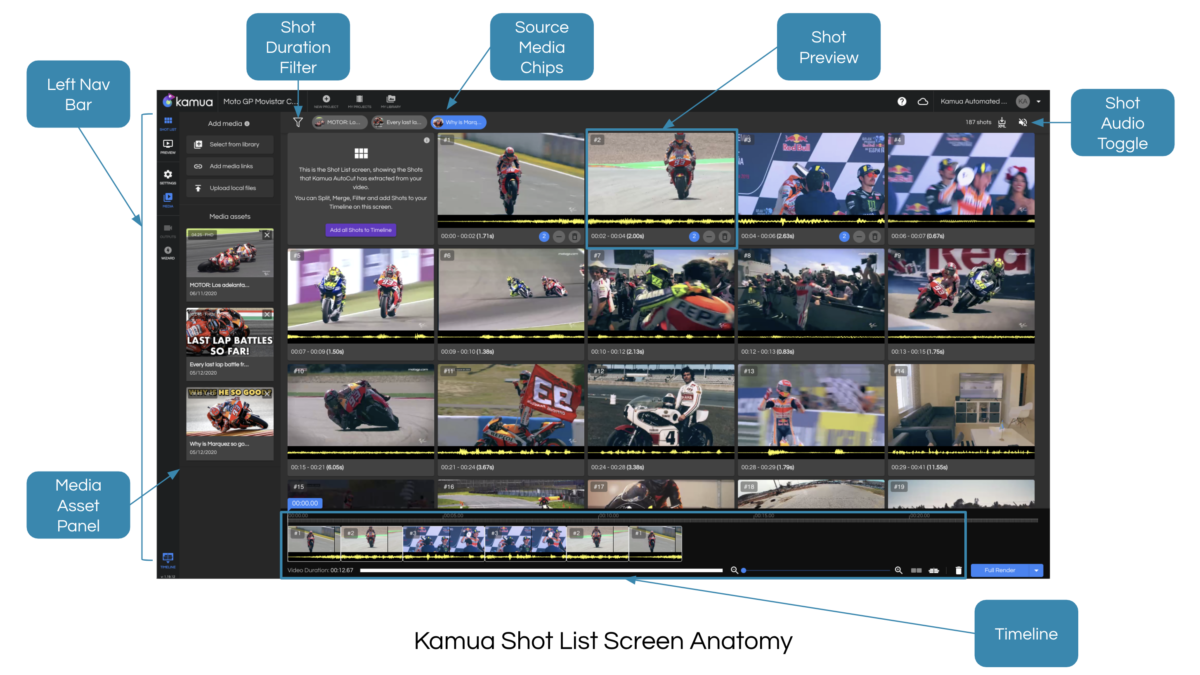
☕️ TL;DR – AutoCut detects the cut points in videos and automatically splits the video at each cut point, saving you valuable time. The resulting “pieces” of the video are called Shots and can be split further or merged according to what you need.


☕️ TL;DR – The Source Timeline allows you to view the currently selected Clip in the context of its Source Media.


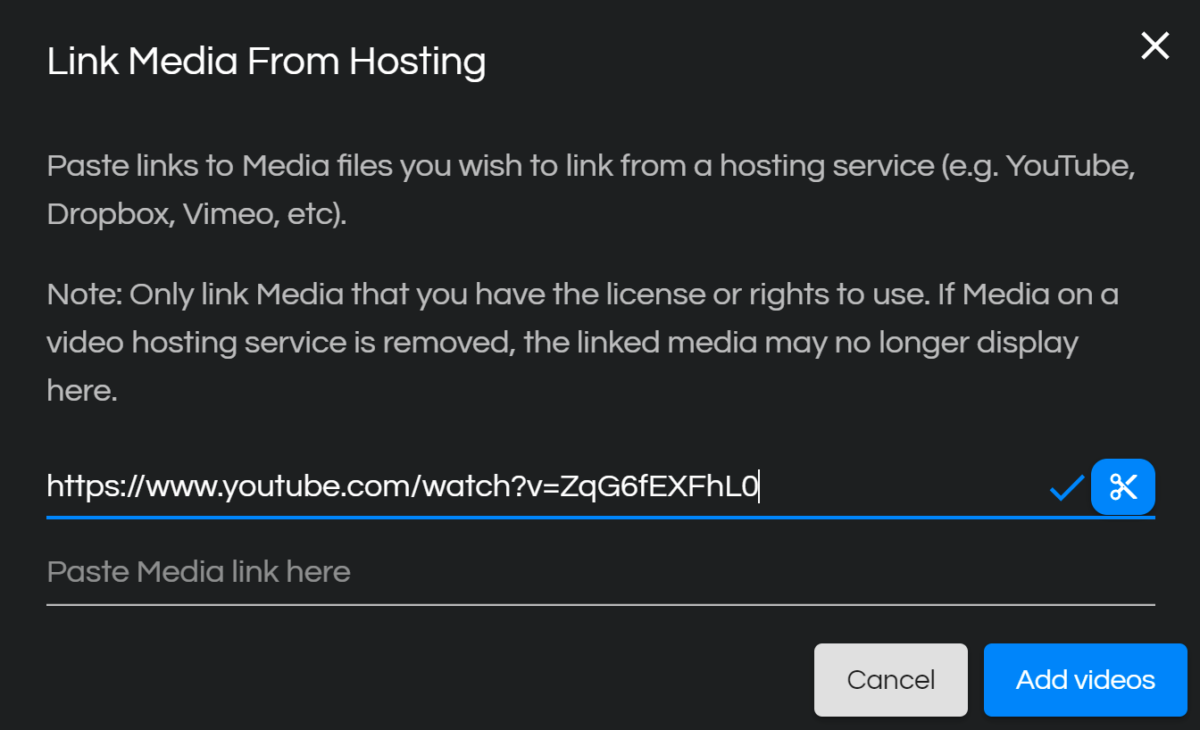
☕️ TL;DR – You can create a new Project in Kamua by importing Media via an external Link, your Library or locally from your computer.