

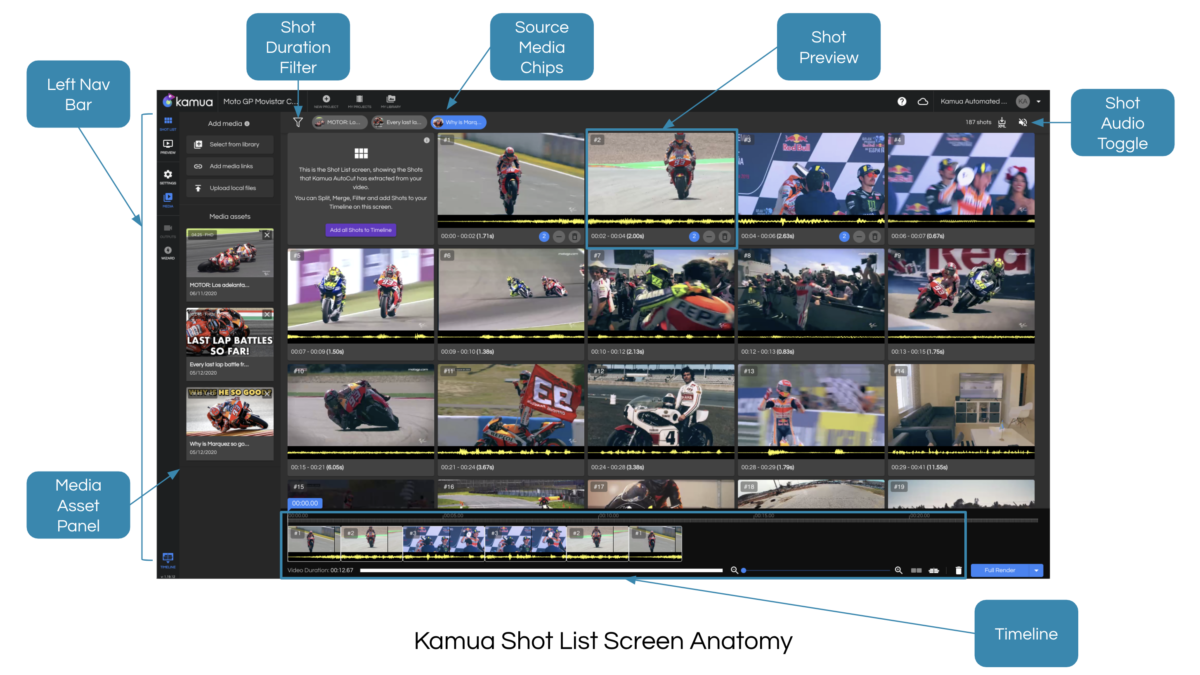
☕️ TL;DR- The Timeline is an interface where you lay Clips, one after the other (in a linear fashion) to create a video. It’s at the bottom of the Kamua Studio screen and can be turned on/off by using the button on the bottom of the left navbar.
☕️ TL;DR- The Timeline is an interface where you lay Clips, one after the other (in a linear fashion) to create a video. It’s at the bottom of the Kamua Studio screen and can be turned on/off by using the button on the bottom of the left navbar.

☕️ TL;DR – Your Outputs are the rendered versions of your videos which appear after you hit the “Render” button.

☕️ TL;DR – The Source Timeline allows you to view the currently selected Clip in the context of its Source Media.

☕️ TL;DR – Motion KeyFraming allows you to set the position and size of the Crop Box at specific points in your video, giving you full creative control. This enables you to create panning and/or zooming effects with precision and accuracy.

☕️ TL;DR – Crop Settings and Project Settings allow you to set visual and audio parameters that will affect all the clips on your timeline.

☕️ TL;DR – If your video contains people speaking, you can display the dialogue on the screen by activating Kamua’s Automatic Captions feature and you can manually edit or create a Transcript.

☕️ TL;DR – If your video contains action sequences, people or objects that are not in the center of the video and you need to crop the video for a mobile format, you can use AutoCrop to crop the entire video or just the Clips that have movement.
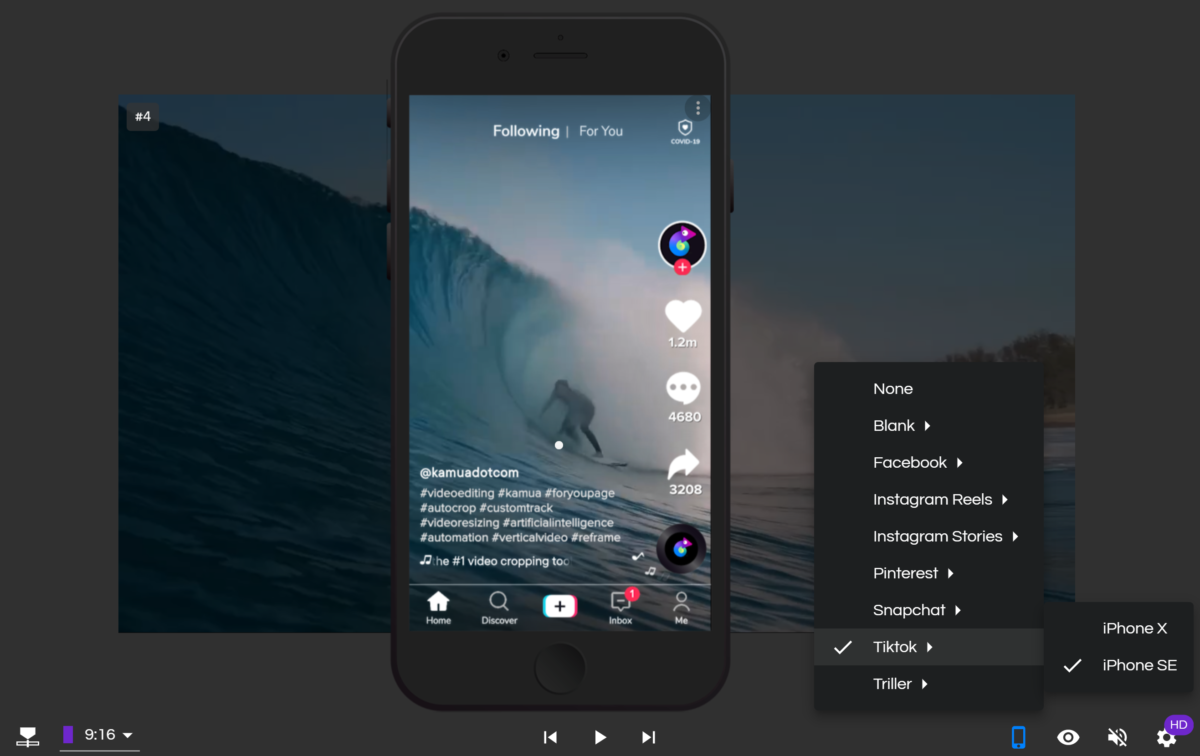
☕️ TL;DR – A Social Media Skin is a way to pre-visualise what your videos will look like on mobile social platforms, such as TikTok, Instagram Reels, Facebook Stories, Triller, Snapchat and Pinterest.
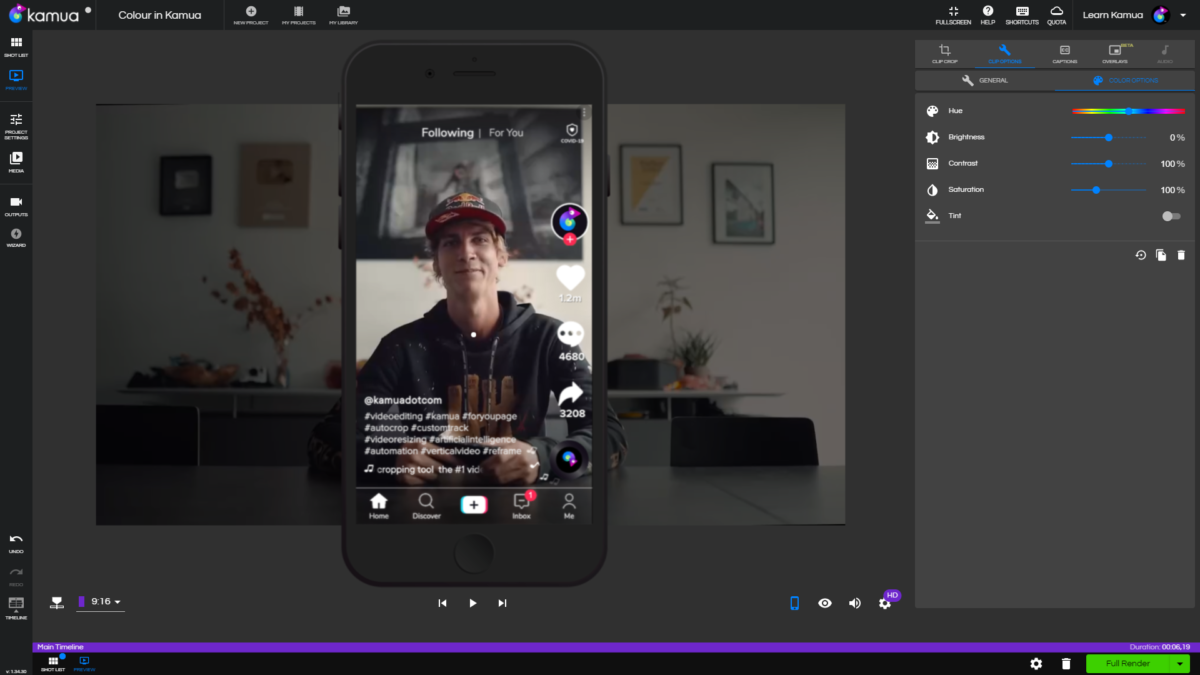
☕️ TL;DR – Kamua has powerful color and lighting adjustment tools directly in your web browser. You can change hue, brightness, contrast and saturation with a few clicks.

☕️ TL;DR – You can retrace your steps in Kamua using the Undo and Redo buttons in your left navigation panel.


