

☕️ TL;DR- The Timeline is an interface where you lay Clips, one after the other (in a linear fashion) to create a video. It’s at the bottom of the Kamua Studio screen and can be turned on/off by using the button on the bottom of the left navbar.
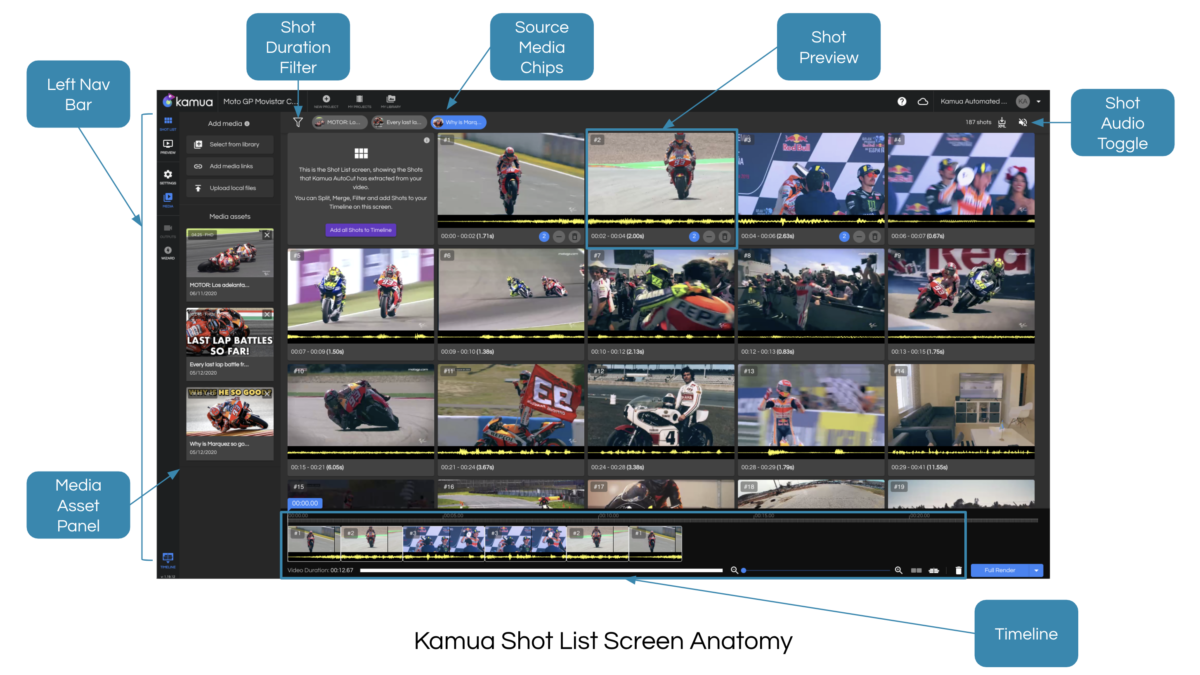
☕️ TL;DR- The Timeline is an interface where you lay Clips, one after the other (in a linear fashion) to create a video. It’s at the bottom of the Kamua Studio screen and can be turned on/off by using the button on the bottom of the left navbar.

☕️ TL;DR – The Source Timeline allows you to view the currently selected Clip in the context of its Source Media.

☕️ TL;DR – Crop Settings and Project Settings allow you to set visual and audio parameters that will affect all the clips on your timeline.

☕️ TL;DR – If your video contains people speaking, you can display the dialogue on the screen by activating Kamua’s Automatic Captions feature and you can manually edit or create a Transcript.
☕️ TL;DR – You can Split Clips from the Timeline using the scissor button on the Playhead or pressing “C” on your keyboard.

☕️ TL;DR – Overlays are layers that you can place on top of your videos that contain logos, watermarks, photos, shapes, emojis and more.


