Categories
Tutorial

How to create GIFs and still images from any video

It’s never been easier to create high-quality GIFs and capture frame-perfect still images from a video. This article will show you how to do both in Kamua. In just a few clicks, you can create GIFs and capture still images from almost any online platform, such as YouTube, Facebook, Twitter, Vimeo and more.

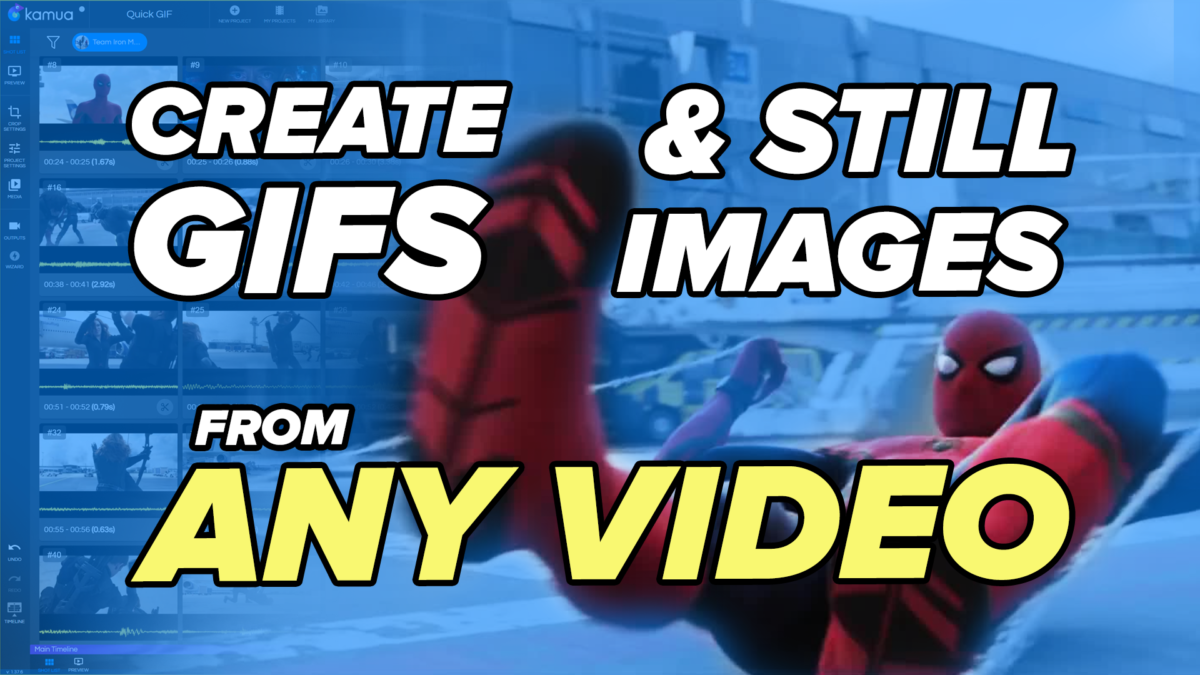
How to Capture Still Images

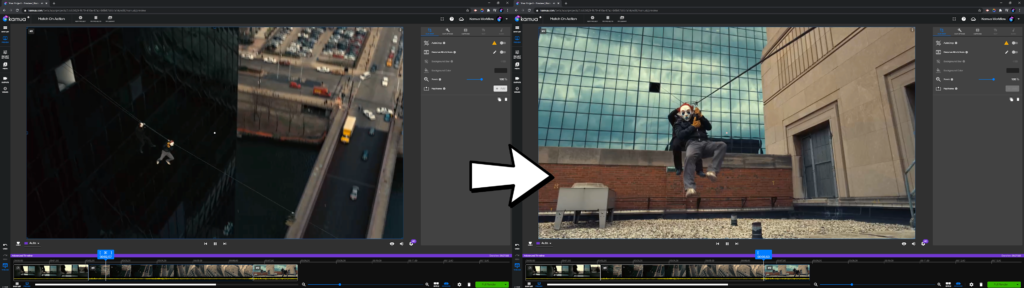
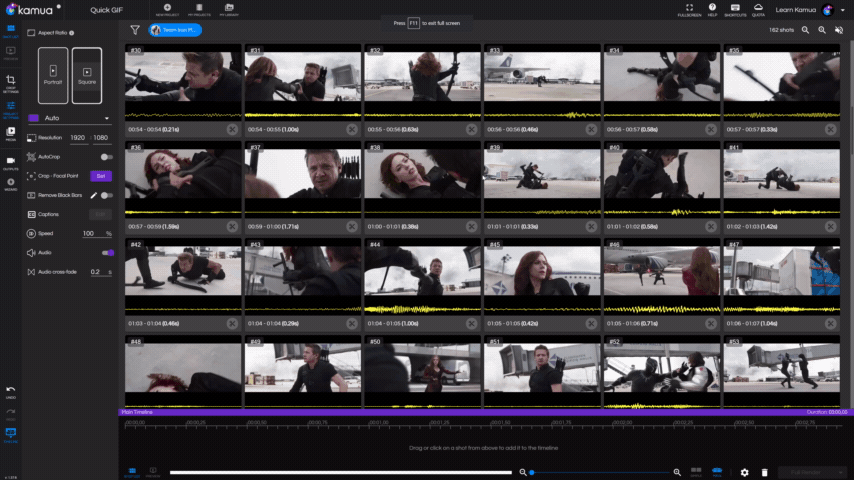
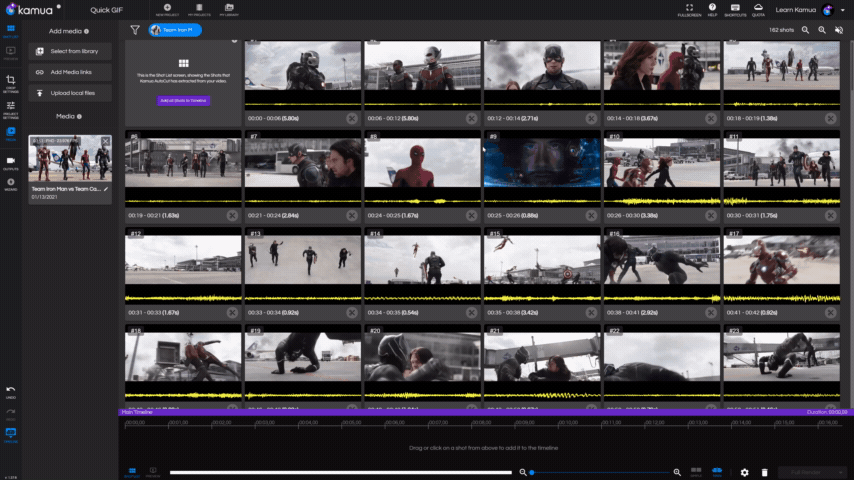
  1. Add your video to Kamua, and watch AutoCut do its thing. It will automatically cut the video into all of its component Shots, making it super-easy to visualize.
  2. Use your mouse wheel to browse the Shot List and find the Shot containing the image that you want to capture.
  3. Add the Shot to the Timeline as a Clip, by clicking it once, or dragging it to the Timeline.
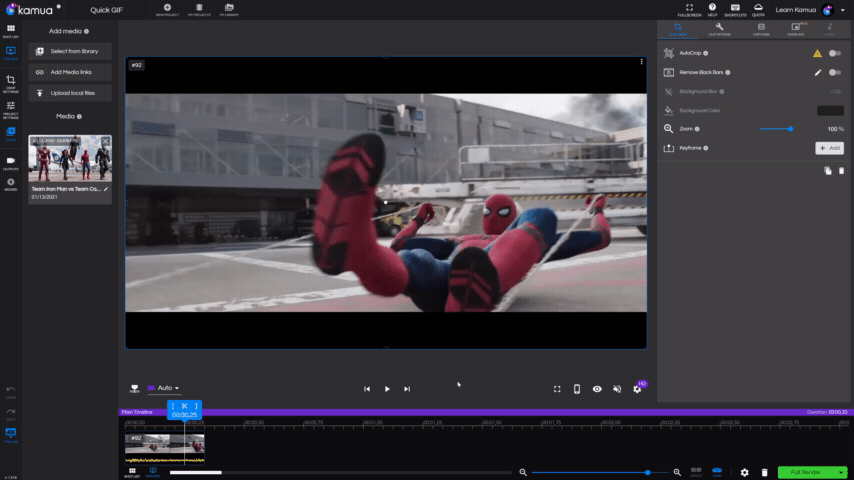
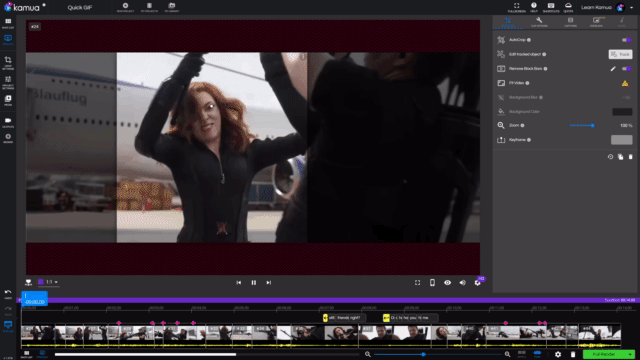
  4. Click on the Clip in the Timeline to enter Preview Mode. You can now play the Clip to preview it, by clicking the Play button, or hitting the Space Bar on your keyboard.
  5. Position the Playhead at the point that contains the image to be captured. You can fine tune the exact frame you want to capture by using the arrow keys on your keyboard, to browse the video frame-by-frame.
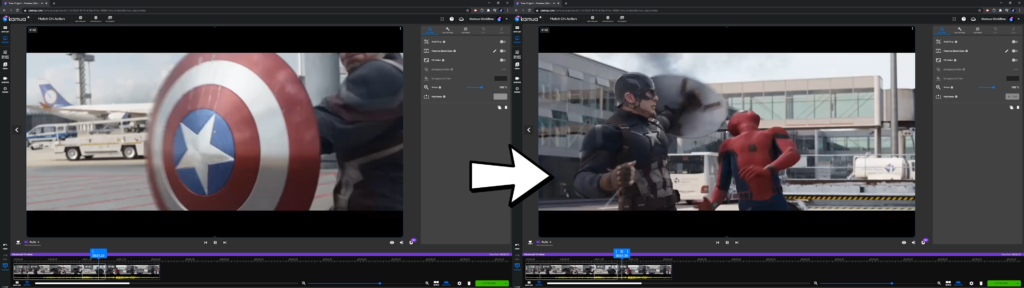
  6. Once you have determined the exact frame you want to capture, click on the three dots in the top-right corner of the Preview Window and select Capture Current Video Frame.
  7. The image will now open in a new tab. You can right-click the image to Copy to Clipboard, or save to your computer.
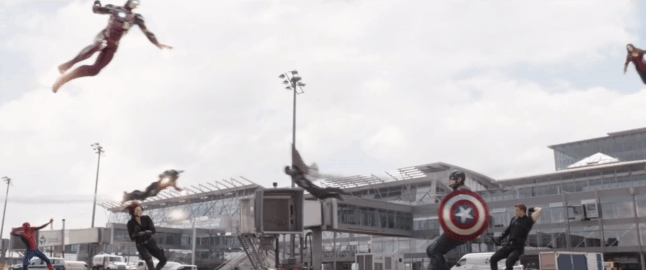
How to Create GIFs

👑 THE GOLDEN GIF RULE 👑

To convert a video to a GIF in Kamua, it must be no longer than 15 seconds in duration. ⌚
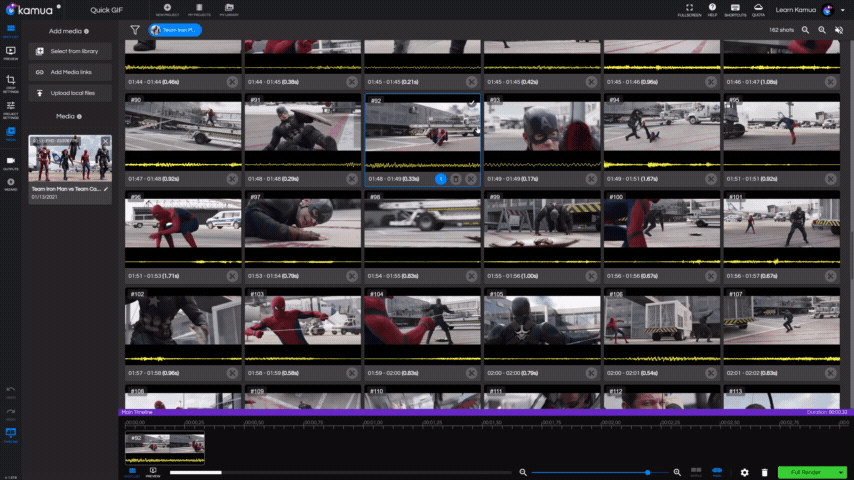
  1. Similar to steps 1-3 above, add your Shots to the Timeline by clicking or dragging them. To select multiple consecutive Shots at once, click the check on the first Shot. Hold SHIFT on your keyboard, then select the last Shot. All Shots in between will be selected and you can click the Add Shots to Timeline button above the Shot List.
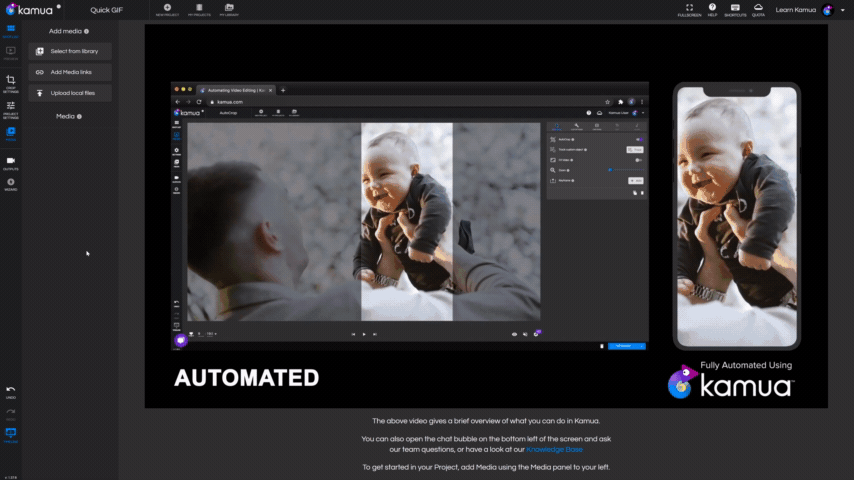
  2. It’s now down to you to decide what your GIF will look like, using the host of features Kamua has to offer. It can be as simple as one shot taken from the video, with no changes applied to it, or a sequence of shots, carefully edited with AutoCrop, CustomTrack, Keyframes, Captions, Color Adjustments, and Black Bar Removal.
  3. Once your video is ready to go, select either Draft Render, Full Render or Multi-Render from the Green button in the bottom-right of the screen. You will be taken to the Outputs page, where the your rendered video will be displayed.
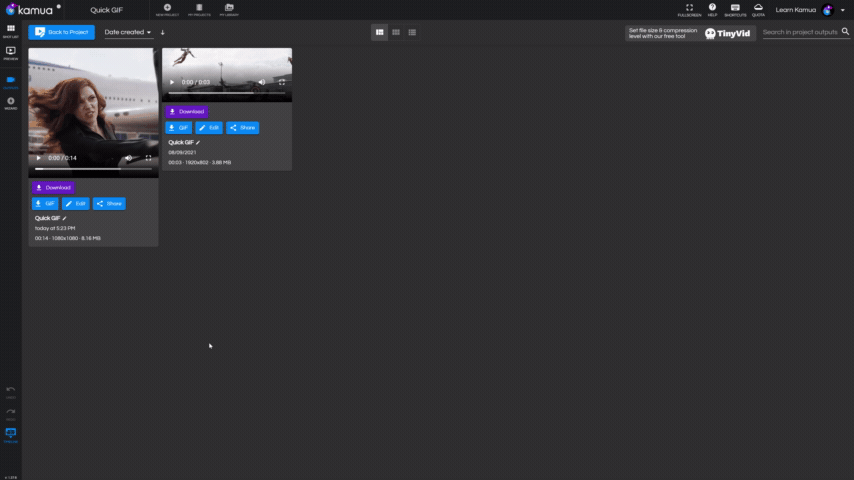
  4. If your video’s duration is 15 seconds or less, you will have the option to download as a GIF underneath the output. Clicking on this will give you several quality options for the GIF. There is also a Custom Quality GIF option, where you can set your desired Resolution, Frames-per-Second (FPS) or Dithering. Dithering affects how the GIF is compressed. Some options are better for graphics and some are better for video. Have a play around to see what works best for you!

Categories
Tech TikTok Tutorial YouTube

MAKE FOOTBALL MOBILE WITH KAMUA

https://kamua.com/blog/wp-content/uploads/2021/04/Football-Ronaldo-social-skin-2021-04-08-11_28.mp4

With vertical video exploding in 2021 with the likes of TikTok, YouTube Shorts and Instagram Reels, is now the time for the beautiful game to fit our mobile screens?

Yes, it is!
Scan the QR code to watch the goal above on your phone

Football’s coming home

The pandemic hit the sports world hard! No cheers, just empty seats and empty stadiums…Football really did come home in 2020. With almost every football league around the world suspended, fans were left with limited options like watching classic football games or escaping to social media for some memes.

Twenty of Europe’s biggest clubs lost more than €1bn in revenue over the past year while almost 10% has been knocked off players’ average values as the game struggles with the economic impact of the Covid-19 pandemic, according to a study by the market analyst KPMG.

The Guardian

Clubs had to get creative and find a way of staying connected to their fans. Many started taking their social media channels more serious and the game became shooting for likes, tackling comments and stopping the scroll. Fans can now go behind the scenes and see their club’s training games, early highlights and some hilarious content.

The gooooal is now vertical

With the demand to make more football content than ever, Kamua is a no brainer. It’s the most versatile, AI browser-based tool for repurposing videos to date. Kamua is equipped with the ability to automatically track the subject in a video using AutoCrop and apply KeyFrames to help the creator control the motion manually. These powerful tools combined, offer creators the ability to crop the fast-paced action of football into the vertical 9:16 aspect ratio, all in a web browser. Easy😎.

https://kamua.com/blog/wp-content/uploads/2021/04/AC-Milan-Smoother-KF-Recording-2021.0.00-22.04.compressed.mp4

Simple Breakdown

  1. Once you have added your Shots to the Timeline, simply switch on AutoCrop in your Project Settings and play it back in Preview Mode.
  2. To make finer adjustments to the position of your crop box, add a KeyFrame at the point you want to tweak and another where you would like it to stop. Move the Crop Box to the last KeyFrame and you’re done.
  3. You can repeat this process on as many Clips as you like on the Timeline.
  4. Share with the fans ⚽

Keep up using Custom Track

Football has many moving parts and part of the challenge with vertical video is choosing who or what to focus on. With Kamua you can utilise tools like CustomTrack to help you test and speed up these decisions. In the short video below you can see how easy it is to change which player AutoCrop tracks by simply applying Custom Tracking.

https://kamua.com/blog/wp-content/uploads/2021/04/Custom-Track-Football-2021-04-09-13_14.mp4

Caption this!

With so many viewers watching content on mute, Captions are now a must-have! Not to worry, Kamua’s auto-generated Captions are all you need. Creators can easily tweak the Captions right on the Timeline, change the style, colours and choose from an extensive font selection to make sure videos stay on brand.

https://kamua.com/blog/wp-content/uploads/2021/04/Arteta-press.mp4

In addition, the amazing Social Media Skins feature allows you to see where the captions would look best across various social media platforms. This is a game-changer! No more guessing and exporting only to find that TikTok’s UI got in the way of your Captions.

Make content faster

@liverpoolfc

D I ⚽️ G ⚽️ A L 😍 That Trent cross 👌 #lfc #fyp #liverpool #trending #foryoupage #sport

♬ 爱的流行 – DJ BAI

With Kamua, football clubs’ social media managers can now enjoy a lightweight experience of repurposing content. All they need is a link and Wifi 👌.

Gone are the days where fancy, labour intensive animated graphics are needed to wow the viewers. Like the TikTok video above shows, people want organic content that’s straight to the point. Kamua is designed to make it easier to find those moments and repurpose them to share with the world.

Hey, why not try it out for yourself—just sign up for free on our Home Page. Get ready to have your mind blown by how much time this powerful tool will save you.


Did you find this post helpful? Check out the article on how to turn your videos into YouTube Shorts. Subscribe to our YouTube channel for more content creating tips.

Categories
Tech Tutorial YouTube

THE BEST TOOL FOR CREATING YOUTUBE #SHORTS

https://kamua.com/blog/wp-content/uploads/2021/03/YT-Shorts-blog-vid-Shakira_2.mp4

The battle for vertical video is heating up following the launch of YouTube Shorts (Beta) in the U.S

Vertical videos used to be considered a phase that would pass, a gimmick or a niche for those too lazy to flip their phones landscape. But with TikTok boasting over 600 million monthly active users worldwide, even the video juggernaut that is YouTube said “Whoa”. With the competition heating up, Kamua is the perfect tool to help you grow on YouTube Shorts.

But first…

What are Shorts?

Shorts are YouTube ‘s answer to TikTok. It’s short-form video content for anyone who wants to create short, catchy videos using nothing but their mobile phones. After TikTok was banned in India (as of June 2020), YouTube seized this opportunity to trial their Shorts app there and are now seeing the number of Indian channels using the tool tripling since the beginning of December alone. “Whoa” 😲

Fundamentals of a YouTube Short:

Although the stand-alone app is not yet available outside the U.S. you can still make Shorts by creating your content outside the platform and uploading them the traditional way, as long as they meet the following criteria:

  • Must be vertical
  • 60 seconds or less
  • Include #shorts somewhere in the description or title to increases virality & to be found by YouTube’s algorithm
  • Engaging (okay that’s just a recommendation 😁)
YouTube Shorts example

Why should you care?

You should care about YouTube Shorts if:

  • You want to stay ahead of the competition
  • You don’t want to be left behind on the next big platform
  • You care about future-proofing your content
  • You want to capture a new untapped audience
  • You create content
  • You want to grow your following
  • You find this a no brainer considering it’s going to be huge regardless of whether you think YouTube doesn’t need to become another TikTok clone😁

How to Create a YouTube Short

Kamua was built to help you future proof your content. How? Well, we’re here to help you repurpose your videos. Experiment with ideas by creating YouTube Shorts from your existing YouTube library. Our tools are there to guide you through the vertical content creating universe. Turn your landscape videos into dynamic vertical videos within minutes. 👇😎

How to make a YouTube Short with Kamua

Wait! There’s more…

You can now preview what your video will look like on YouTube Shorts using Kamua’s Social Media Skins. This game-changing feature is great for making sure things like Captions and Overlays don’t interfere with the YouTube Shorts user interface. 👇🤯

Preview your video with Social Media Skins

Hey, why not try it out for yourself—just sign up for free on our home page. Get ready to have your mind blown by how much time this powerful tool will save you.


Did you find this post helpful? Check out article on how to Turn your Youtube videos into TikTok videos. Please consider subscribing to our YouTube channel for more helpful tips and tricks on how you can get the most out of YouTube Shorts.

Categories
Tutorial

Match on Action: A Simple Editing Trick

Level up your video editing, using this classic Match On Action technique

Ever feel like your editing needs that extra pizazz to take it to the next level? A great way to smash it with your editing game is to use a technique called Match On Action. This is where action begins in one shot, and then continues or finishes in the next shot.

An 8-shot Match On Action – One piece of action continues through from start to finish

So do I have to be making an action movie for Match On Action to work?

No. Before we start, let’s get one thing straight. Action is not just about explosions, car chases, helicopters and fist fights. Yes, these are definitely examples of it, but action can be any movement, no matter how small, such as a head turn, a hand gesture, or simply standing from sitting. All of these major and minor points of action are what make movies and videos what they are.

So how does Match On Action work?

Most movies and many TV shows are filmed with one camera, so all the shots are filmed at separate times, and cut together in the edit to create continuity within a scene.

“Say whaaat?” Yep, that’s right, movie making is one big magic trick. But the Match On Action technique creates the illusion that the action in the shots are all taking place at the same time.

By using Match On Action , you can make the edit flow beautifully, and allow the audience to focus on the story without noticing all of the hard cuts in between.

Match On Action can work in several ways:

1. Action and Reaction – One of the best examples of this is a fight scene. In one shot, you see a person moving to hit someone, then in the next shot, you see the other person being hit, all as one continuous piece of action.

2. Continuous movement – This could be anything from a person running or walking, to a car driving by, to someone travelling down a zipwire, or literally any type of movement you can think of.

3. Camera movement – The director, Edgar Wright is a master of this one (Shaun of the Dead, Hot Fuzz, Scott Pilgrim Vs. The World). He often uses whip pans and crash zooms to transition between shots and scenes. In a whip pan, the camera will quickly pan to one side and cut to another shot that is already panning in the same direction, before landing on the next shot, which is usually a completely new scene. Because the cut is right in the middle of both pans, you barely even notice it. The exact same principle works for crash zoom transitions too.

Get Creative!

Now for that extra pizazz we talked about at the start. You can also use the Match On Action technique in videos that don’t need continuity, such as trailers, montages, compilations, music videos or mash-ups.

Take a look at this Batman and Joker mash-up.

  • [Action] Starting with the 1989 Batman movie, we see Batman throw the punch.
  • [Reaction] We then cut to the Dark Knight, where the Joker gets punched by Batman.
  • [Action] It then cuts back to Batman as he throws another punch.
  • [Reaction] The joker gets punched in the Injustice video game.
  • [Action] The Batmobile comes in and knocks the Joker to the left.
  • [Reaction] We then cut back to the 1989 Batman to a shot of the Joker being knocked through a wall, in the same direction, completing the final Match On Action.
https://player.vimeo.com/external/502237183.hd.mp4?s=1a5bd3a0c15b7edd65e7147e5e837ae9c3dd38db&profile_id=169

Cutting two unrelated shots together with a Match On Action makes it impactful and lets it flow. But most important of all, it looks super cool. So go ahead, what are you waiting for? Try it!


Did you find this post helpful? Please drop us your thoughts in the comments below and consider subscribing to our YouTube channel for more helpful tips and tricks on how you can get better videos done, faster. Or just follow us on TikTok!

About Us: Kamua is a technology startup headquartered in London with engineering operations in Bucharest. With Kamua you can cut, crop and repurpose videos faster, all in a browser, assisted by our AI.

Categories
TikTok Tutorial YouTube

YOUTUBE TO TIKTOK

Turn your landscape YouTube videos into TikTok videos in minutes!

It’s 2021 and TikTok, the new kid on the block with all the cool new toys, came to take the throne as the number one social media app. The filmmaker purist in me said “NO-to the-NAH! That’s for kids and you’ll never see me on there.” Why? Because I’m an adult, with bills to pay and a whole season of the Mandalorian to catch up on.

And…one month later I’m on TikTok! 😳🤣 With 200k views on a single TikTok.

Let’s be honest, EVERYONE wants a piece of the TikTok pie. Their ability to dominate social media with Vertical video is nothing short of genius (aka everyone was home practising their Savage Love moves). The purist filmmaker snob in me had to admit that times are changing and for content creators, it’s either eat or be eaten.

Brands on TikTok have an average engagement rate of 8%. The average engagement rate for brands on Facebook is 0.09% and 1.6% on Instagram. As long as TikTok keeps innovating and pushing ways to keep people scrolling, it will be hard to beat.

Repurpose your content

As always, content is king on TikTok. One way to boost your TikTok content is to repurpose what you already have stored away on YouTube. There may be some audacious, hilarious or epic content you created that’s tucked away in a forgotten playlist, that may work really well for a TikTok trend or challenge. It’s just itching to be reformatted. Thankfully with Kamua, it’s now easier and faster than ever to convert Landscape videos to the Vertical 9-16 aspect ratio.

Simple Steps 😁

  1. Copy and paste your Youtube video link/s into Kamua
  2. Add the Shots you want from your ShotList to the Timeline
  3. From the left Navigation bar go to Settings, select Portrait (9:16), switch on AutoCrop & Remove Black Bars (if you have any).
  4. You can watch it back by selecting Preview from the left Navigation bar or bottom left of your Clips.
  5. To see what your video will look like on TikTok, click the Phone icon below the video, then select TikTok, then iPhone X or iPhone SE.
  6. When you’re happy with it press the green Render button(bottom right)
  7. From your Outputs page, you can watch back and download your video.
https://player.vimeo.com/external/499612982.hd.mp4?s=76718865a3a9008661bb1684117538351e141397&profile_id=169

Hey, why not try it out for yourself—just sign up for free on our home page and request access. Get ready to have your mind blown by how much time this powerful tool will save you.

And yes, you can apply this same technique for YouTube #Shorts, Instagram Stories, Reels, IGTV, Snapchat, Twitter, Pinterest, Triller, Reddit, and so many more places.

Did you find this post helpful? Please drop us your thoughts in the comments below and consider subscribing to our YouTube channel for more helpful tips and tricks on how you can get more and better video done, faster. Or just follow us on TikTok!

About Us: Kamua is a technology startup headquartered in London with engineering operations in Bucharest. With Kamua you can cut, crop and repurpose videos faster, all in a browser, assisted by our AI.

Categories
Tech Tutorial

Motion Tracking in Adobe After Effects

CONTENTS: Watch Tutorial | Key Points | Custom Tracking in Kamua

https://player.vimeo.com/external/443057824.hd.mp4?s=f4defab843ee9e3c73ca43f7917099d70b56bab7&profile_id=175

Let’s face it, there’s a lot of great content being produced out there and it can be daunting to find ideas, let alone stand out from the crowd. Sometimes I watch Zach King’s videos with my jaw on the floor—questioning what I’m doing with my life. But there’s hope. Sites like Pinterest are a great resource for Motion Graphic ideas and concepts. So, if you ever find yourself struggling for ideas, go take a deep dive into a world of photo inspiration and get those creative cogs turning.

Let’s get tracking 😎

Watch the tutorial below and take a deep dive with me into Motion Tracking and animating paths.

Tutorial Key Points 🤓

1. Track your footage:
• Select your footage in the timeline.
• Go to the Tracker panel and select Track motion.
• Place the Tracking box where you want After Effects to track the movement and adjust accordingly.
• Analyze forward.

2. Use a Null to parent all the assets you need tracking:
• Right-click on the timeline, select New and choose Null Object from the drop-down.
• In the Tracker panel choose Edit Target and select the Null. Click Apply and accept the X/Y dimensions.

3. Draw and Parent your shape layer:
• Select the Pen tool and start drawing out the shape you want. Trace over a reference image if it helps.
• Parent your shape layer to the Null. Simply grab the pick whip tool from your shape layer and drag it onto the Null layer.
• Adjust the positioning of the shape layer to where you want it.

4. Trim Paths
• From your shape layer drop-down menu, select Add in the Contents row and choose Trim Paths. This will help you animate your shape path.
• Under Trim Paths, make sure both the Start and End values are at 0.0%. Add a keyframe on Start from where you want the animation to begin and another where it should end.
• On that last keyframe for the Start value, increase it from 0.0% to 100%
• Playback and add additional keyframes to control the speed if needed.

5. Light to dark
• Use the pen tool to create a mask around the layer you want to go dark.
• In the mask options for that layer, increase the feather to soften the mask.
• Select Tint from your Effects panel and change the colour white to any colour you think works best for that shot.

Practice by playing 💡

To get better with Motion Graphics is to allow yourself to play with ideas. Use the techniques from the tutorial to create something new, something weird and something simple. Some ideas work better than others but that’s all part of the game. The important thing is to get comfortable with the software and you only get there if you practice and play.

Custom Tracking in your browser 🤯

Motion Tracking is a very useful technique to use in After Effects. We also believe it’s extremely useful for video repurposing—so much, that we built our own Custom Tracking tool you can use in your browser. Yes, that’s right…in your browser😎.

https://player.vimeo.com/external/443331630.hd.mp4?s=a197348521522d3b292b4a7fc6d63d33b856e6d7&profile_id=169

Hey, why not try it out for yourself—just sign up on our home page and request access. Get ready to have your mind blown by how much time this powerful tool will save you. Check out this great guide to learn more about Custom Tracking.

Did you find this post helpful? Please drop us your thoughts in the comments below and consider subscribing to our YouTube channel for more helpful tips and tricks on how you can get more and better video done, faster.

About Us: Kamua is a technology startup headquartered in London with engineering operations in Bucharest. With Kamua you can cut, crop and repurpose videos faster, all in a browser, assisted by our AI.

Categories
Tutorial

How to Mask in Adobe After Effects

CONTENTS: Watch Tutorial | Key Points

https://player.vimeo.com/external/435115275.hd.mp4?s=21bf40d5ce3f3dbed84f461a8a99841a8931173e&profile_id=175

2020 was the year of virtual insanity. On-demand streaming skyrocketed, everyone wanted to Zoom and even Gordon Ramsey started dancing on TikTok. Yes, things got weird.

The world was officially on lockdown and ”bored in the house-bored in the house bored.” This was a great time to get creative! So, I decided to get some fresh air and do what every video editing Jedi does on their break…dance in the street to a Jamiroquai classic of course.

Let’s learn some masking 😎

I created this video in After Effects, but you can do this in Premiere Pro or any other editing program you prefer. Please watch the tutorial below and follow along as we take a deep dive into all things nerdy.

Tutorial Key Points 🤓

1. Plan ahead: I believe this is a relatively easy technique for you to learn, even if you are just starting out in After Effects. However, take some time to really block out your shots. Get creative—have some interesting actions you can perform to make your video stand out from the rest. Editing really is easy the part.

2. Duplicate and Freeze: Once your footage is on the timeline, duplicate that layer (Ctrl+D for PC & Cmd+D for Mac). Right-click the duplicated layer on your desired frame, head up to ”Time” and select ”Freeze frame”

3. Pen and Zoom: The duplicated layer will now be frozen. It’s now time to put the work in my friend, this part will take some time. Head up to your tools, select the pen tool and start drawing a mask around your subject. Be sure to really zoom in for this. Use the hand tool/spacebar to help you navigate the screen.

4. Trim and Repeat: Once the mask has gone full circle, you should be able to see the original below it. Now, trim the duplicate layer from the point you want it to dissapear (Ctrl+Shift+D for PC & Cmd+Shift+D for Mac). Play back what you have so far and watch your progress. Make adjustments if need be & get ready to it all over again😁.

Always duplicate from your first layer (the unfrozen layer).

5. Mind the gaps: Make sure you also mask out the sections that reveal the unfrozen layer. Select the frozen layer again and draw another mask. This should automatically display as another colour. Click the drop-down on that layer to reveal the masks, head to the second mask, select the ”Add’ drop-down and choose ”Subtract”.

6. Change to square: The last thing I did to make it pop was change the aspect ratio of my final edit from 16:9 (1920×1080) to 1:1 (1080×1080). This allowed me to just keyframe the position of the video from left/right and even zoom in/out for that dolly motion effect. This is the secret to the magic! You can even add some fake camera shake on there—just play and have fun with it.

That’s it! Try it out and don’t be afraid to push it further: innovate, get creative. Please share with us what you come up with, we’d love to see it 🙌.

Did you find this post helpful? Please drop us your thoughts in the comments below and consider subscribing to our YouTube channel for more helpful tips and tricks on how you can get more and better video done, faster.

About Us: Kamua is a technology startup headquartered in London with engineering operations in Bucharest. With Kamua you can cut, crop and repurpose videos faster, all in a browser, assisted by our AI.