

☕️ TL;DR – When resizing a video to a new Aspect Ratio using AutoCrop, CustomTrack allows you to select and track specific objects, to keep them in frame.
Heads Up: This is an intermediate feature set and it only works if you have AutoCrop already turned on for the Project or for the Clip in question. Make sure you know about AutoCrop before taking this on.
In this article, you will learn;
- When to use CustomTrack
- How to use CustomTrack
- When to split a Clip
- About KeyFraming with CustomTrack
When should I use CustomTrack in Kamua?
You may want to use CustomTrack for a number of reasons. Here are some examples;
- If you have multiple subjects (or objects or regions) in your video, you may want to CustomTrack a different subject (or object or region) to the one AutoCrop has selected.
- You may want to CustomTrack something else in the video that is not necessarily the main subject, for instance a logo or text.
- If a subject, object or region is too large to fit inside the Crop Box, you can CustomTrack exactly which part of the subject you want to keep in frame.
- You can also use CustomTrack to refine what AutoCrop has already done for you automatically.
Pro Tip: If you are in a hurry, you may wish to run AutoCrop first on all of your Clips in the Timeline by hitting Draft Render. Then, you can use CustomTrack just to fine tune the Clips where the AI didn’t track what you wanted or where you want to track something or someone different.
How do I use CustomTrack in Kamua?
- Add your Clip to the Timeline.
- Set your Aspect Ratio.
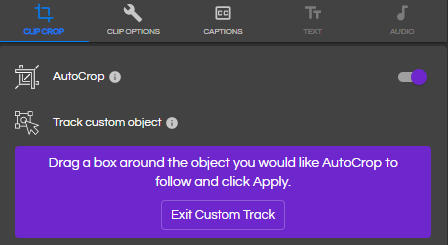
- Enable AutoCrop. You will notice that the

- Click The Track

purple zone to cancel. 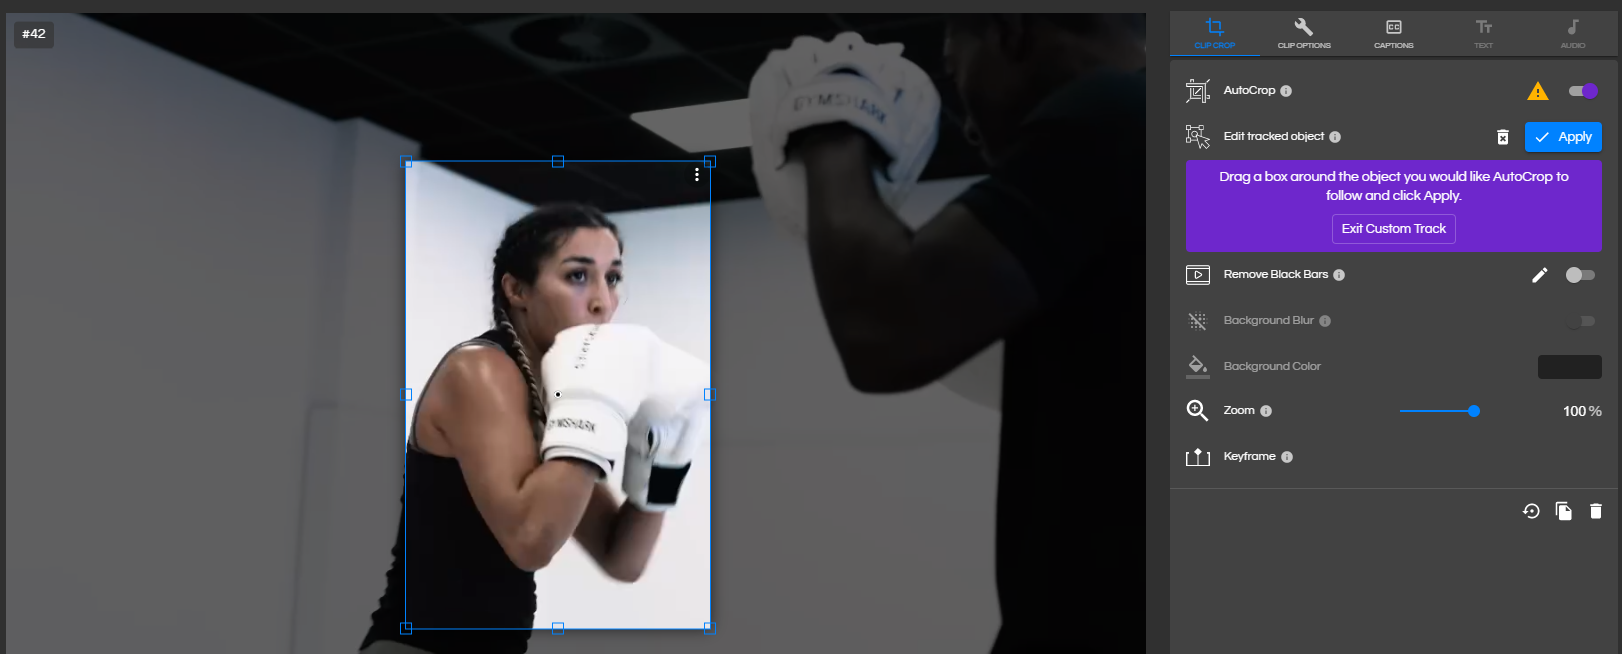
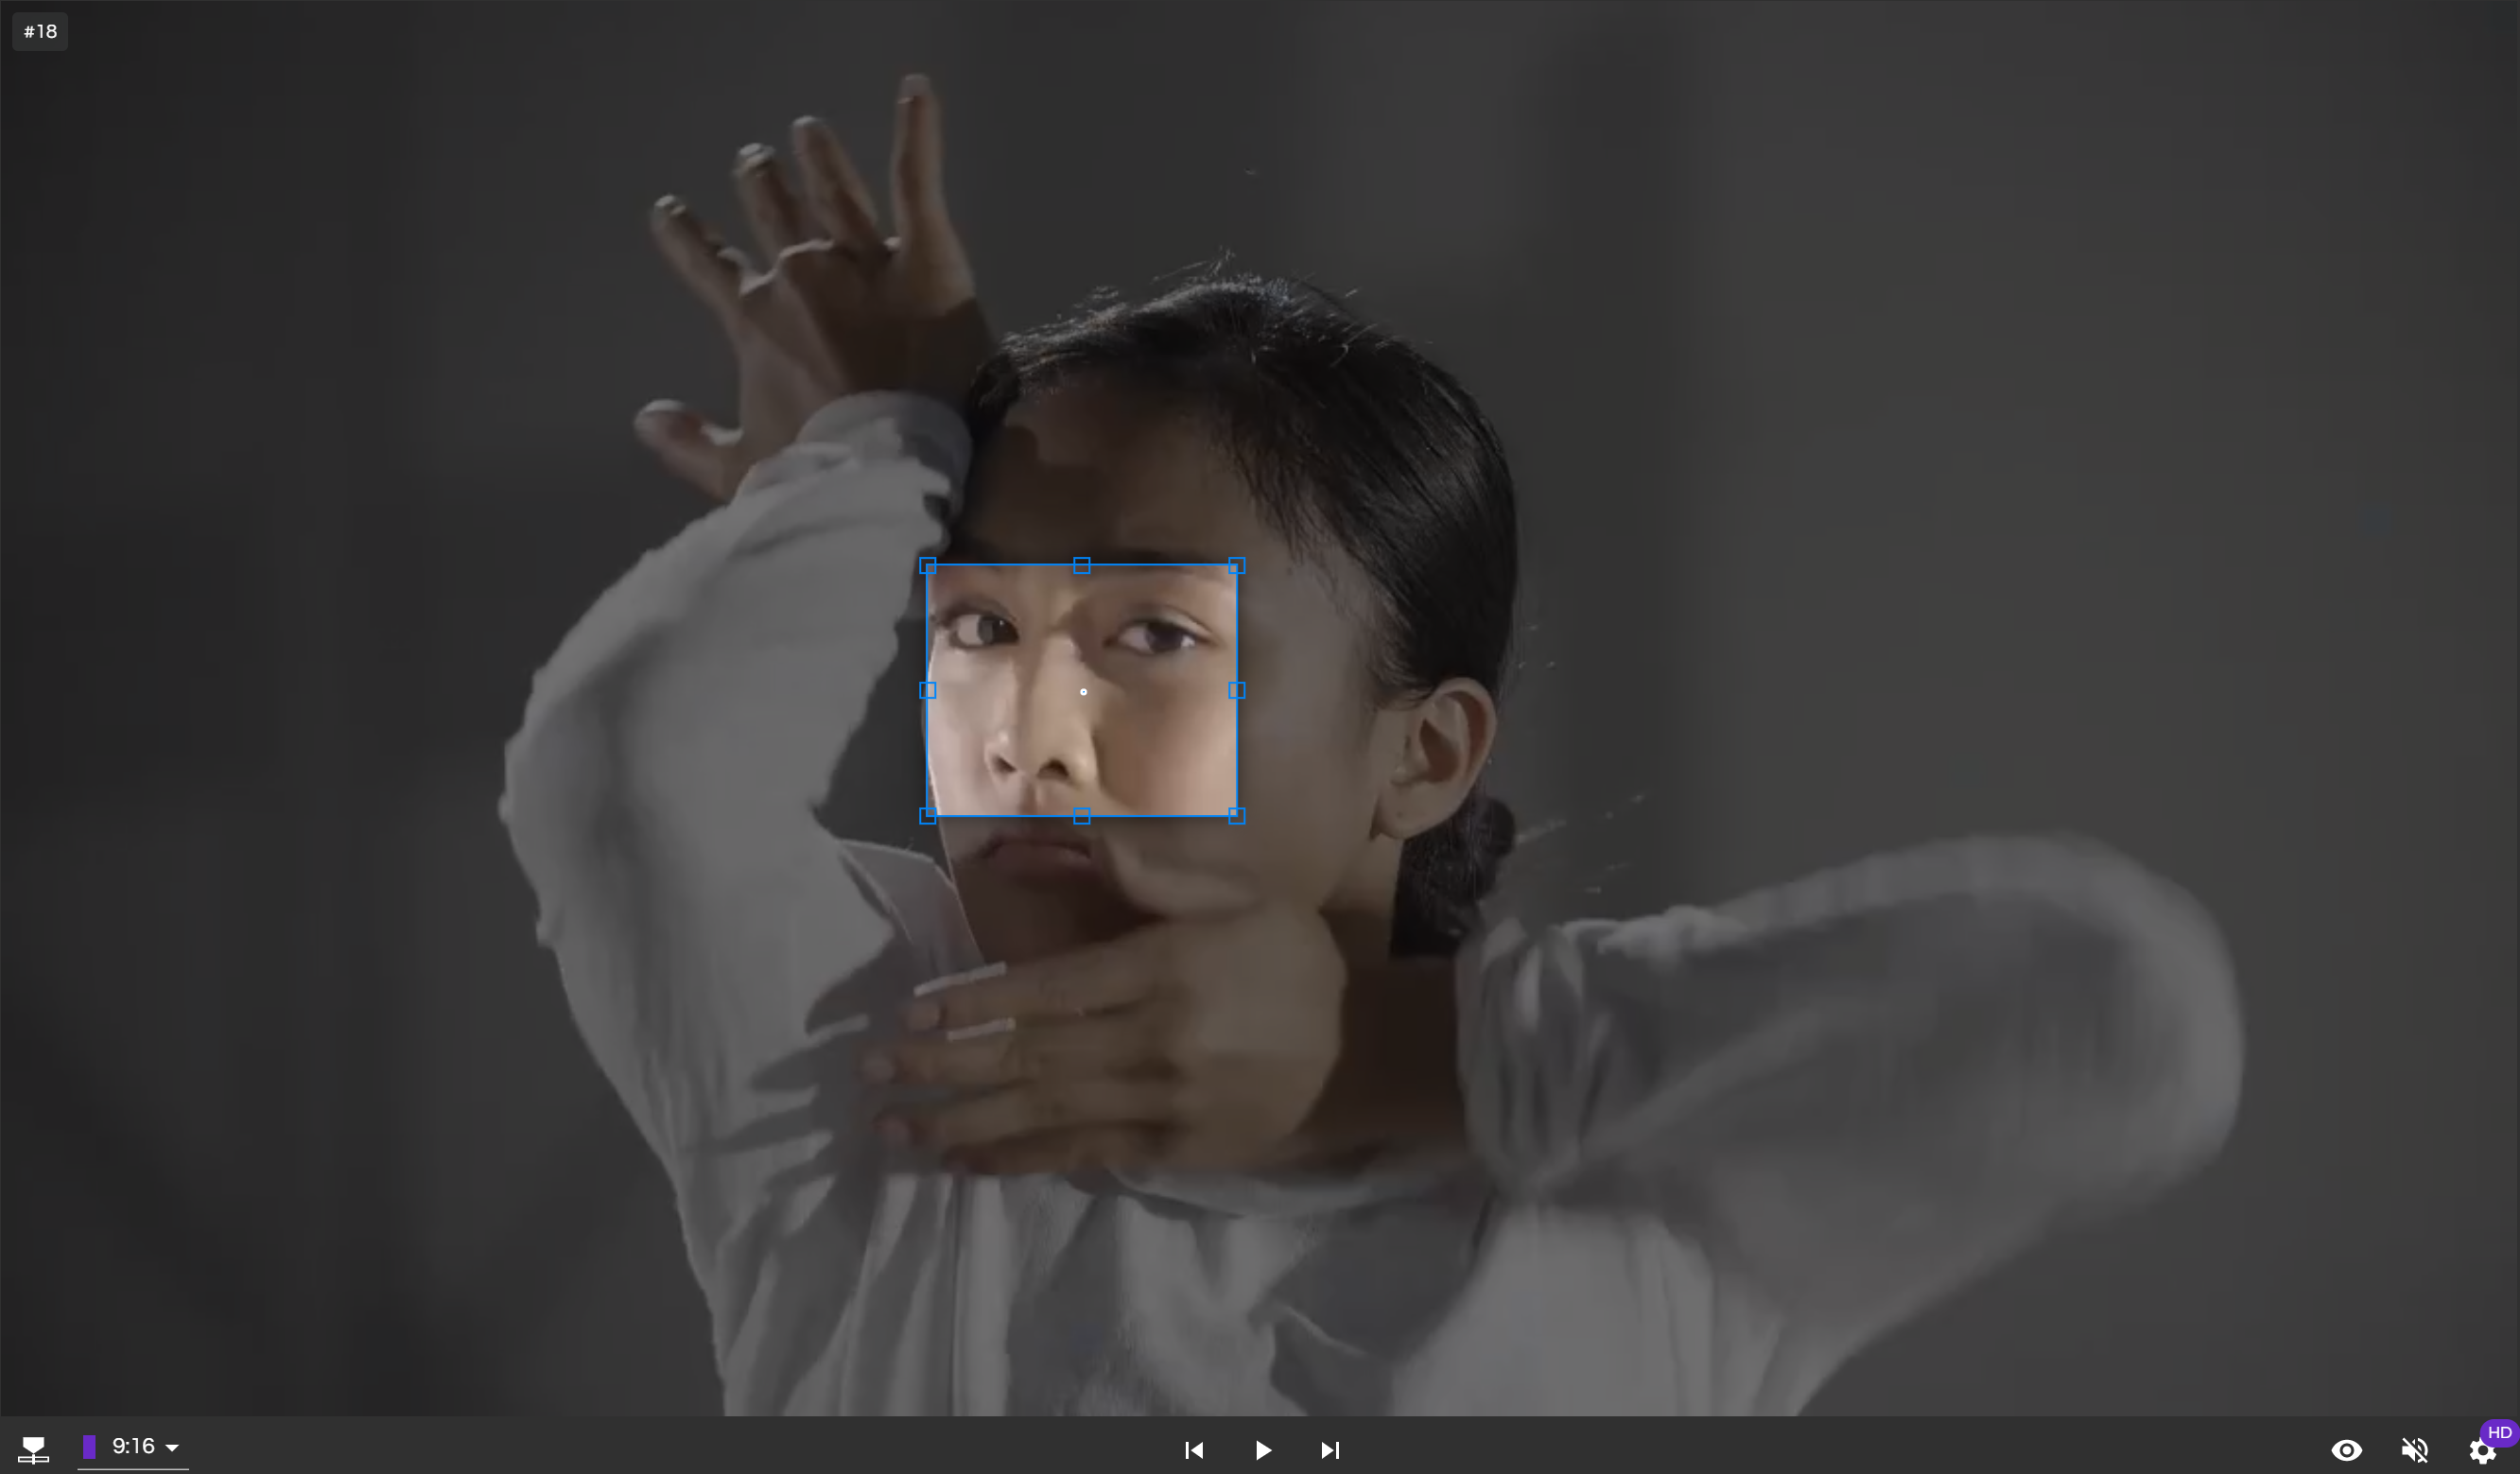
If you need to track a person’s face (because AutoCrop selected other parts the body by default), we recommend selecting just the eyes and nose with the CustomTrack Box.
- The Track


- After setting your CustomTrack box and clicking the


Heads Up: CustomTrack will only select one subject, object or region per Clip, and sometimes it loses track of exactly what you want. So, this means sometimes you will have to pause the Clip, then Split the Clip where CustomTrack loses the tracking, and then use CustomTrack again on the next Clip you just created after the Split.
Pro Tip: While the CustomTrack is processing, you can carry on working on other clips in your timeline. Use the ![]()
![]()

When should I split a Clip when using CustomTrack?
Sometimes, you may need to CustomTrack a person or object that is not visible at the beginning of the Clip.
If this is the case, simply navigate to the part of the Clip where the object or person becomes visible, and use the ![]()
Can I KeyFrame with Custom Track?
Once you have added CustomTracking to a Clip, KeyFraming works in exactly the same way as it
does with AutoCrop. Check the article, KeyFraming with AutoCrop, to learn how.