


☕TL;DR In Kamua, you can very easily remove black Bars from a video, for any Aspect Ratio. You can remove them from the entire video, or from individual Clips.
In this article, you will learn how to Remove Black Bars:
- from an entire video via the Crop Wizard.
- from an entire video on the Timeline.
- from individual Clips on the Timeline.
- even if you have text or logos in the black bar area.
How do I remove Black Bars from an entire video via the Crop Wizard?
- Add your video to a project via the Add Media options in the left side nav bar..
- Click on the Wizard

- Select Crop Wizard

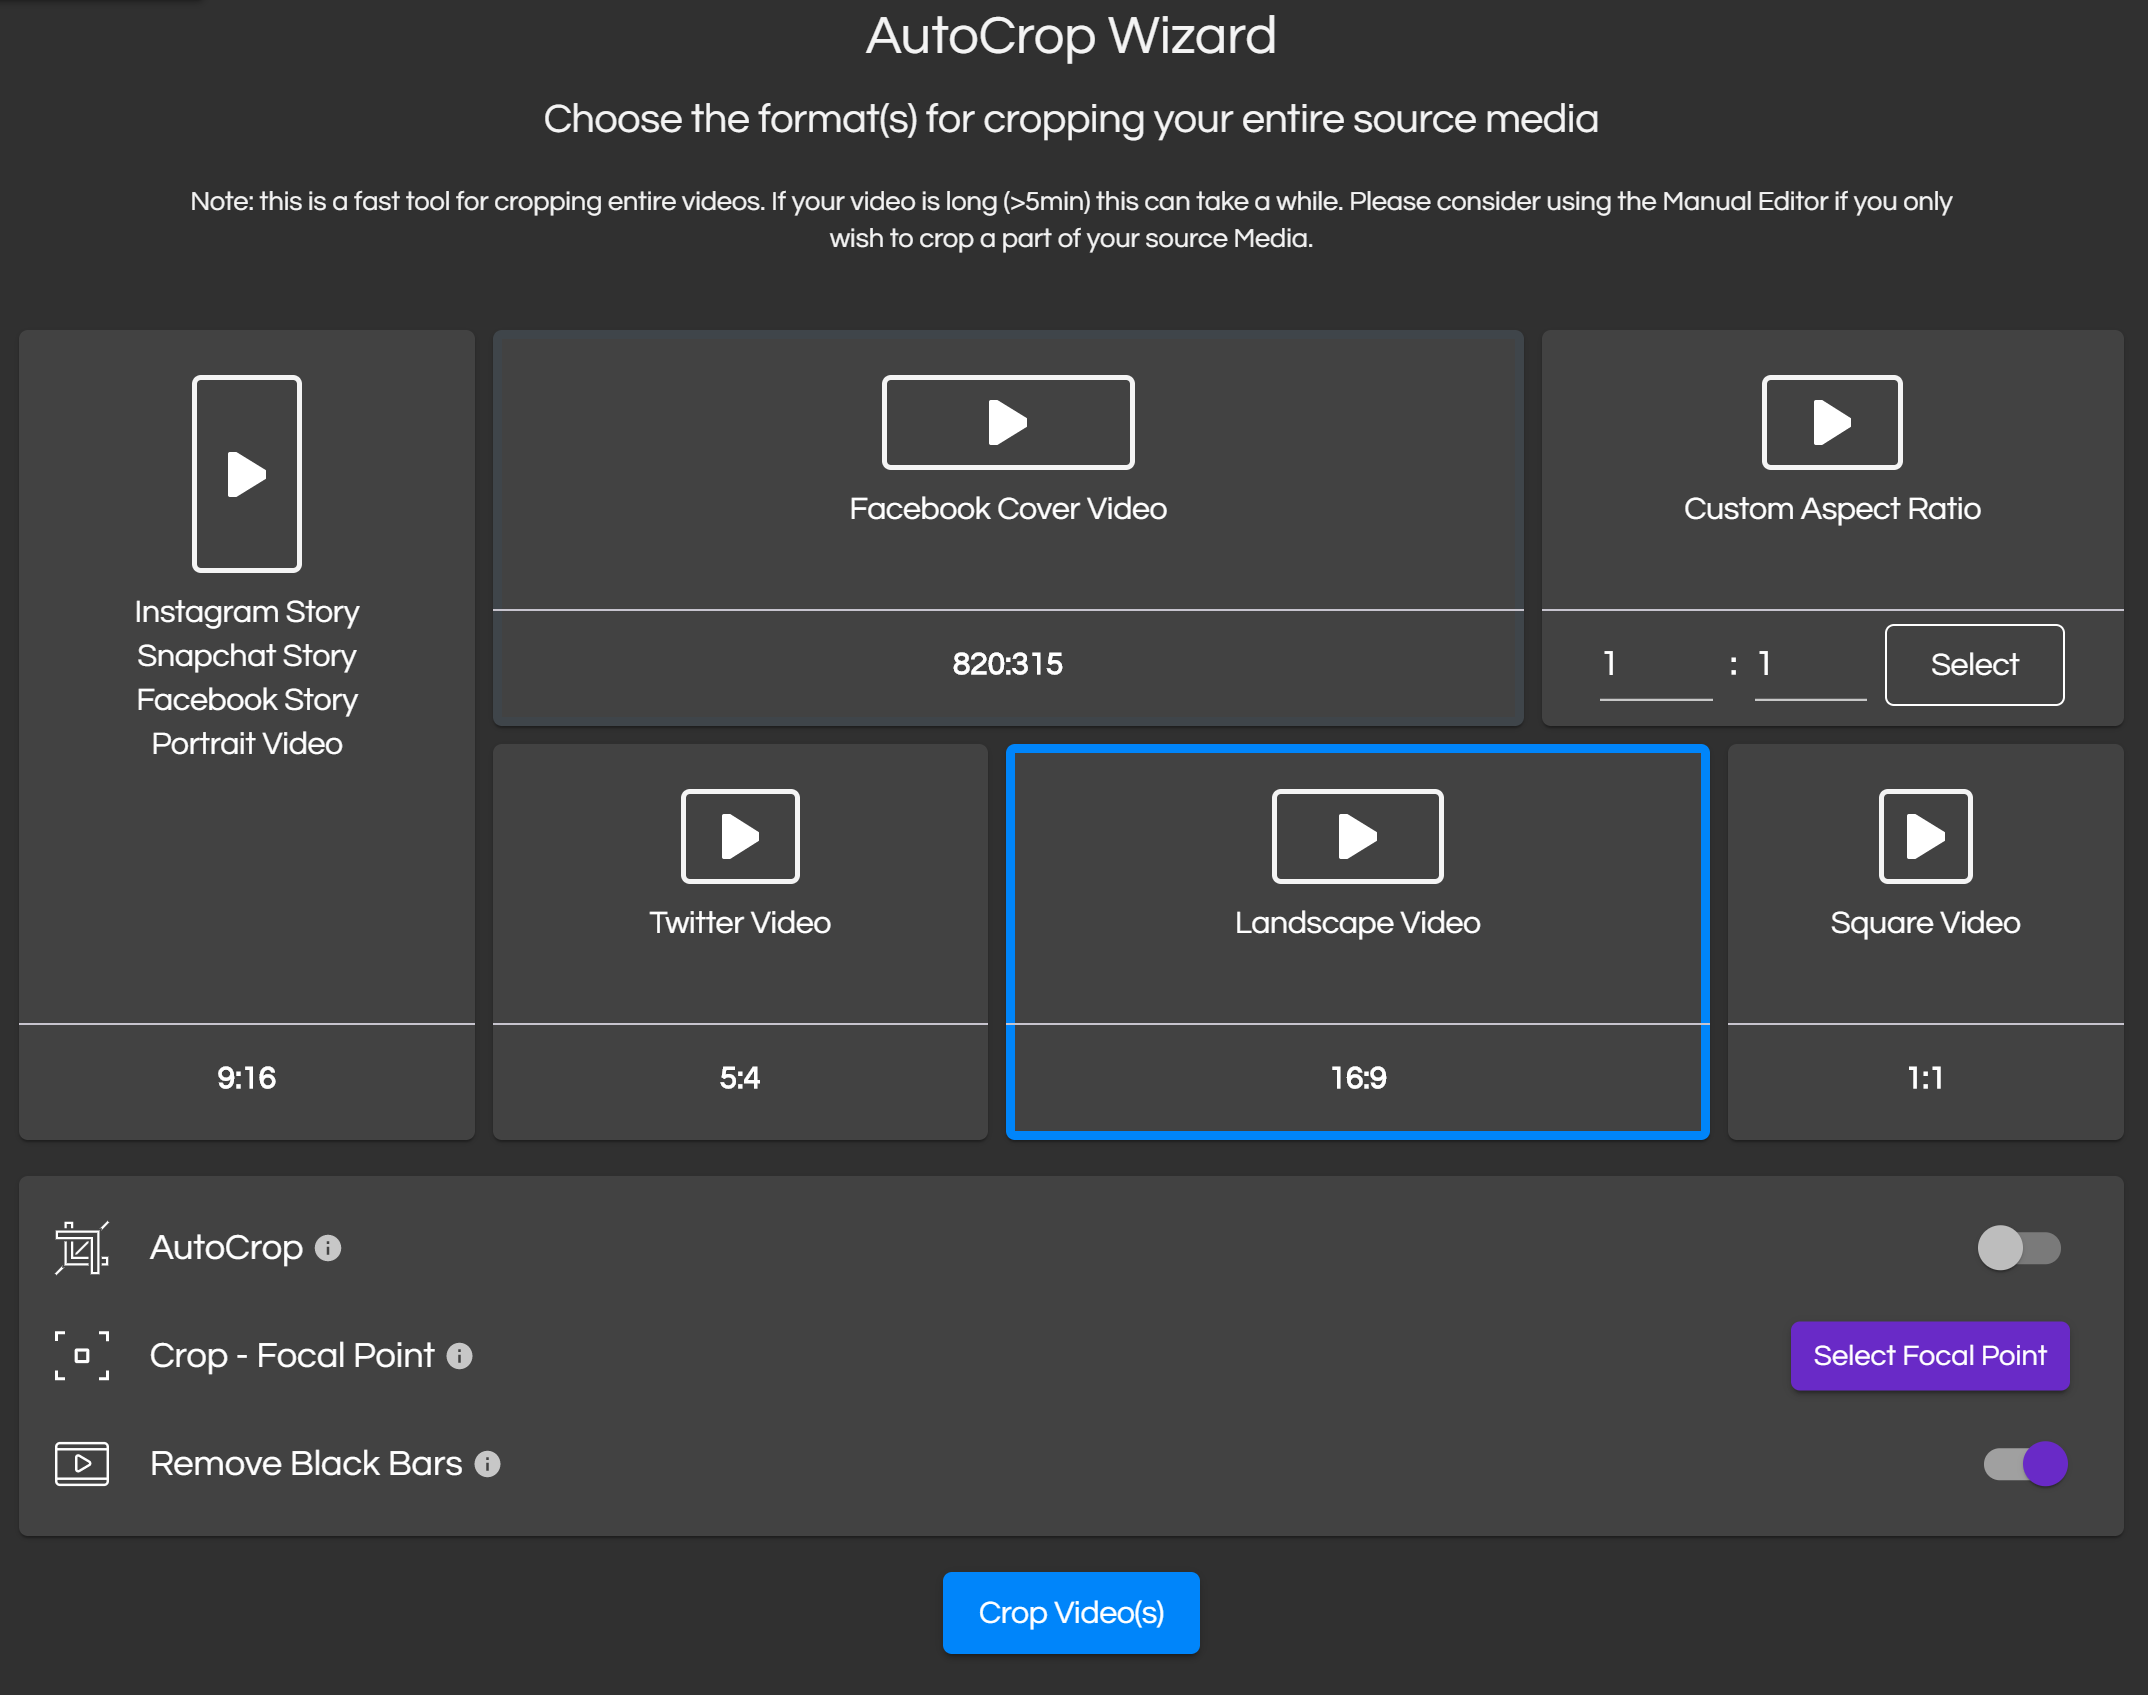
- Select any Aspect ratio. If you don’t wish to change it, simply select the same aspect ratio of your video.
- Toggle AutoCrop
- Toggle Remove Black Bars

- Click the Select Focal Point button

- Click the Crop Video(s) button

- Wait for the Render to be completed (rendering is done in the cloud, not on your local machine) and then view the resulting output.
- If you are happy with the result, click the Remove Watermark button


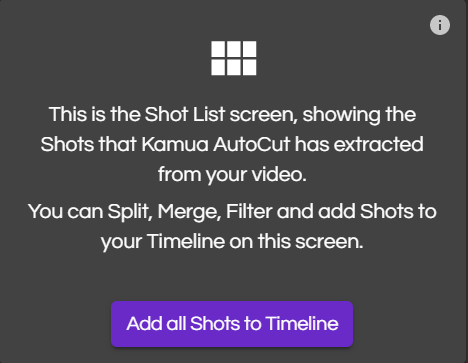
How do I remove Black Bars from an entire video on the Timeline?
- Add your video to a project via the Add Media options in the left side nav bar.
- Click on the Shot List

- Click on the Add all Shots to Timeline button

- Open the Project Settings

- Select the desired Aspect Ratio for the Project using either the quick icon buttons or the drop-down.
- Toggle Remove Black Bars
- When Remove Black Bars is enabled, you will see a checkered overlay over the Black Bars. You will not be able to move or enlarge the Crop Box over this area.
- Click the Draft Render (watermark, low quality) or the Full Render (no watermark, full quality) option on the bottom right of the screen.
- Wait for the render to be completed (rendering is done in the cloud, not on your local machine) and then view the resulting output.


How do I remove Black Bars from just one or a few Clips, not the whole video?


- Click on a Clip in the Timeline to open up the Clip Modal
OR
Click on the Preview
- Select Clip Options

- Toggle Remove Black Bars
- NOTE: You will not be able to use the Fit Video feature, while Remove Black Bars is enabled.

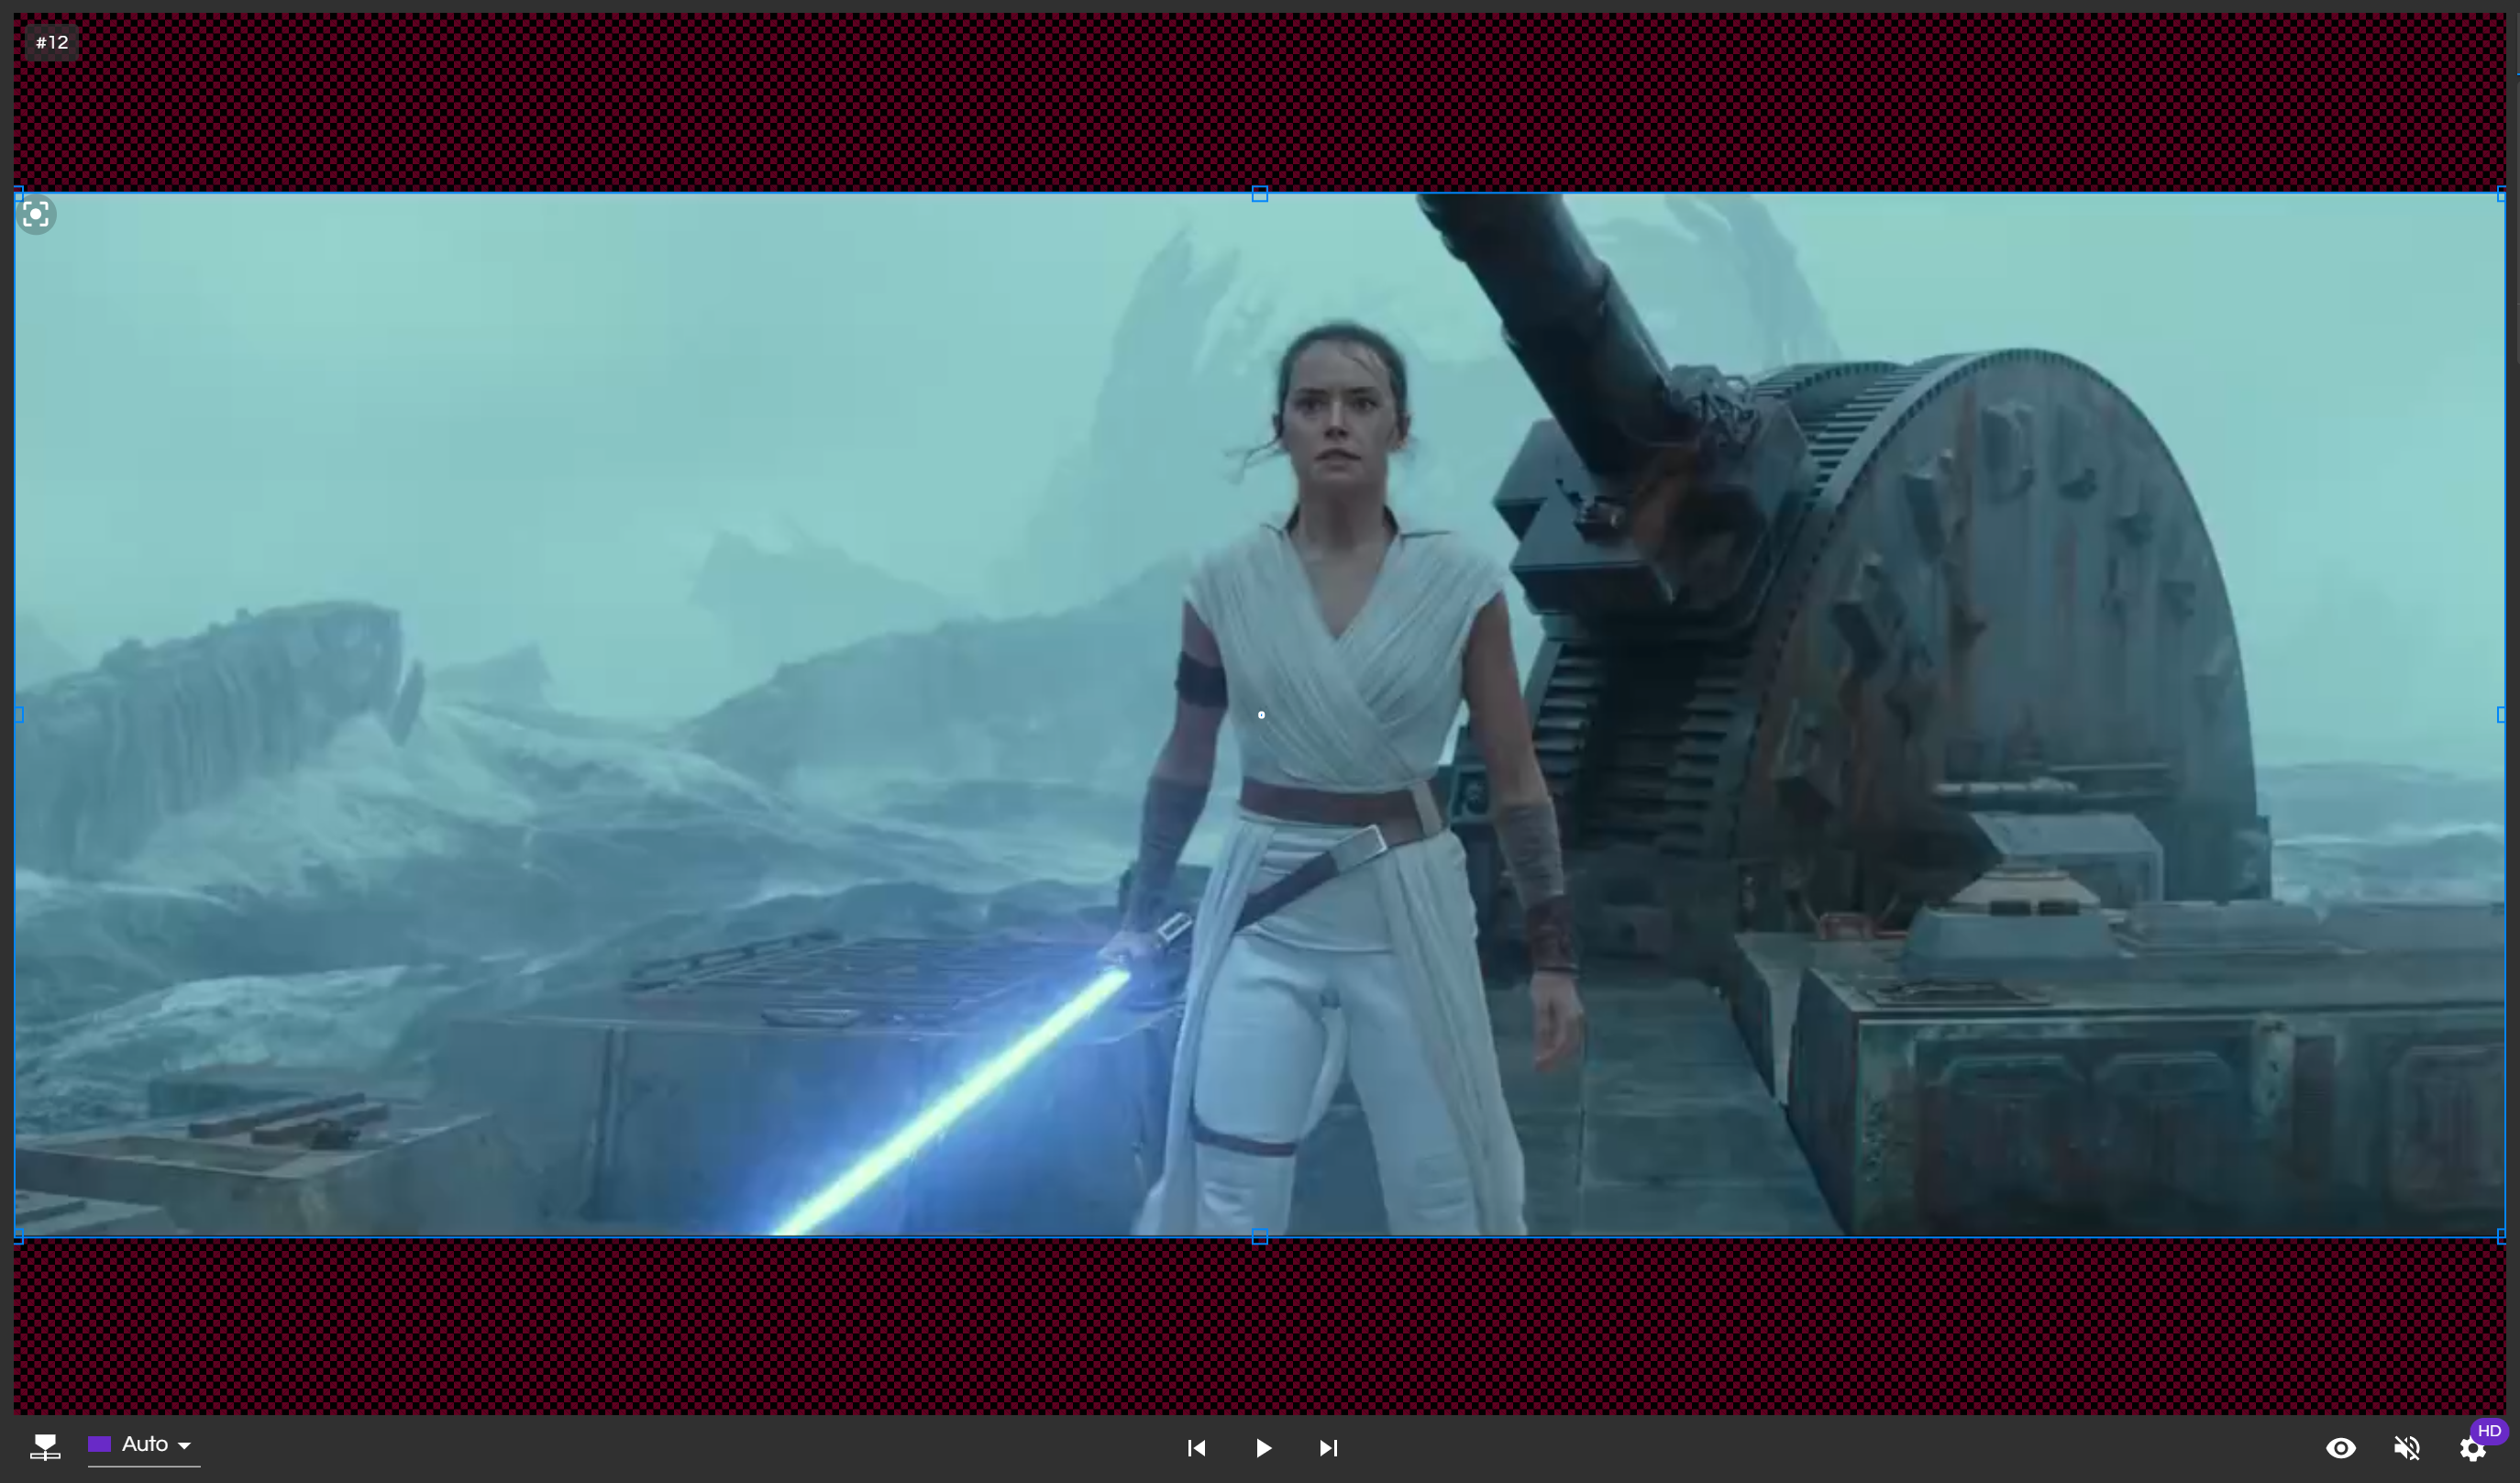
How do I remove Black Bars manually?
Having logos or text in the black bar regions can cause the black bar auto-detection to be less accurate, as the AI looks for areas at the edges of the video that are completely black. This can be fixed by setting a custom black bar area to the current Clip, or the entire Source Media.
Edit Black Bars for Entire Source Media
- Open the Project Settings
- Click on the Edit Black Bars

- If you have multiple Source Media in your Project, select which one you want to set the black bars for, at the bottom.
- To navigate forward and back in the source media in 1 second increments, hold CTRL (Windows) or CMD (Mac) and press the right and left arrows on the keyboard, respectively.
- Drag any edge of the blue rectangle surrounding the image. The edge you are editing will become yellow, and you will see a round magnifying window, showing the area surrounding your mouse cursor. This helps you to set the black bar region exactly on the edge of the video, or wherever you choose, with precision.
- Once you are done editing the black bar region, click the Apply to Whole Media button. This will apply the black bar removal to the currently selected Source Media and close the black bar editing screen.
Edit Black Bars for Individual Clips
- Click on a Clip in the Timeline to open up the Clip Modal
OR
Click on the Preview - Select Clip Options
- Click on the Edit Black Bars
- To navigate forward and back in the Clip, in 1 second increments, hold CTRL (Windows) or CMD (Mac) and press the right and left arrows on the keyboard, respectively.
- Drag any edge of the blue rectangle surrounding the image. The edge you are editing will become yellow, and you will see a round magnifying window, showing the area surrounding your mouse cursor. This helps you to set the black bar region exactly on the edge of the video, or wherever you choose, with precision.
- Once you are done editing the black bar region, you have two options;
- Click the Apply to current Clip button to apply the black bar removal only to the currently selected Clip and close the black bar editing screen.
- Click the Apply to Whole Media button to apply the black bar removal to the entire Source Media of the currently selected Clip and close the black bar editing screen.
Pro Tip: The Auto Aspect Ratio will be determined by the clip in the Timeline with the least amount of black bars. If Remove Black Bars has been set, a new Aspect Ratio will be determined by the size of the video after the Black Bars have been removed. Click here to find out more about the Auto Aspect Ratio.